
VSCO Review
This is a comprehensive VSCO review and tutorial.
Use the table of contents below to quickly jump to the section you need. Strap in and lets dive into this lengthy VSCO review.
What Is VSCO?
VSCO was a popularly searched term and cultural phenomenon in 2019. It found itself entrenched in pop culture, earning articles in major news publications like The New York Times, Business Insider, and Forbes. You can read more about the cultural aspects at those links.
In the past few years, VSCO has become one of the most popular and useful photo editing apps in the world.
What does VSCO do?
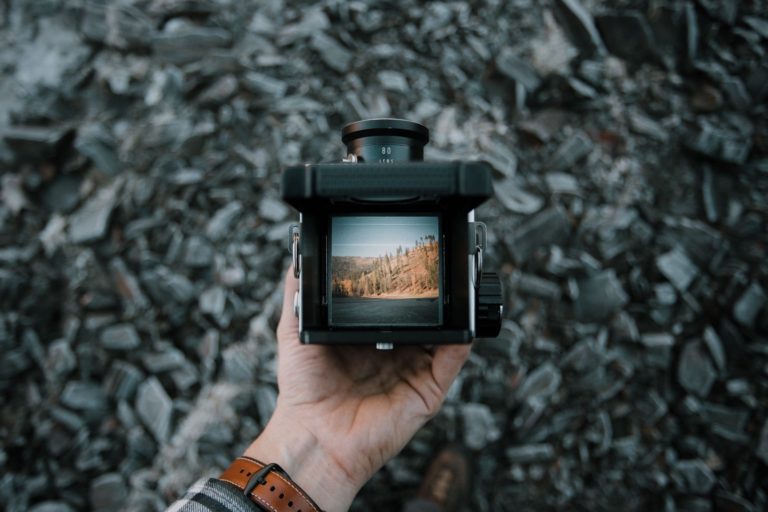
VSCO is a photography app and powerful tool for editing photos and videos on mobile devices.
The name or acronym VSCO is short for Visual Supply Company. The company was founded in 2011 by Joel Flory and Greg Lutze.
It has evolved since 2011 and is now a self described, photo company for creators, by creators.
Visual Supply Company is most popular in 2020 for it’s mobile app VSCO, formerly known as VSCO Cam.
Until December 2018 it was also widely known for it’s (now discontinued) VSCO Film Lightroom Presets.
In 2020 VSCO is primarily used as a photo editing tool, that happens to have a social media component.
VSCO Membership
VSCO is a free app on iOS and Android. It includes 10 free presets and all of the essential editing tools minus HSL, borders, and video editing.
VSCO is easily one of the best apps to get high quality photo editing on your phone. Prepare to practice however. The interface is not intuitive and it can be really confusing to operate.
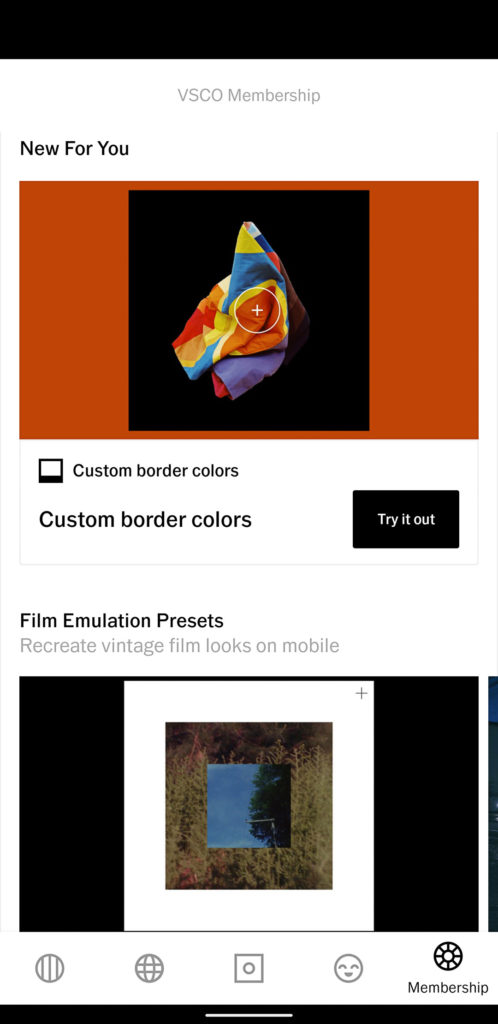
What is a VSCO Membership?
A VSCO Membership includes:
- VSCOs collection of 200+ VSCO presets*
- New VSCO classic and Film X presets
- New tools such as HSL, Borders, Video Editing
- Access to Challenges and Educational content
The VSCO X membership costs $19.99 USD per year.
How To Use The VSCO App
VSCO is divided into 5 main tabs at the bottom of the app:
1. Feed
2. Discover
3. Studio
4. Profile
5. Members
What Is The VSCO Feed?
The VSCO Feed is a social media feed where you will see updates from the VSCO Collection and from the people you follow.
VSCO is a social network where users can post photos to their profile. These photos will then show up in other people’s VSCO Feed if they are following you.
One of the main differences from other forms of social media is that there are no public likes, or following counts. It is a very simple experience. You can post photos to be viewed by your followers, and in turn view other people’s photos.
It is also possible to repost photos that you view in your feed, Discover, or on other people’s profiles. This creates a self-curated gallery of images that is accessible to view in your profile under the collection tab.
You can send private messages to other VSCO users from your profile by touching the bell icon in the top right corner of the profile tab.
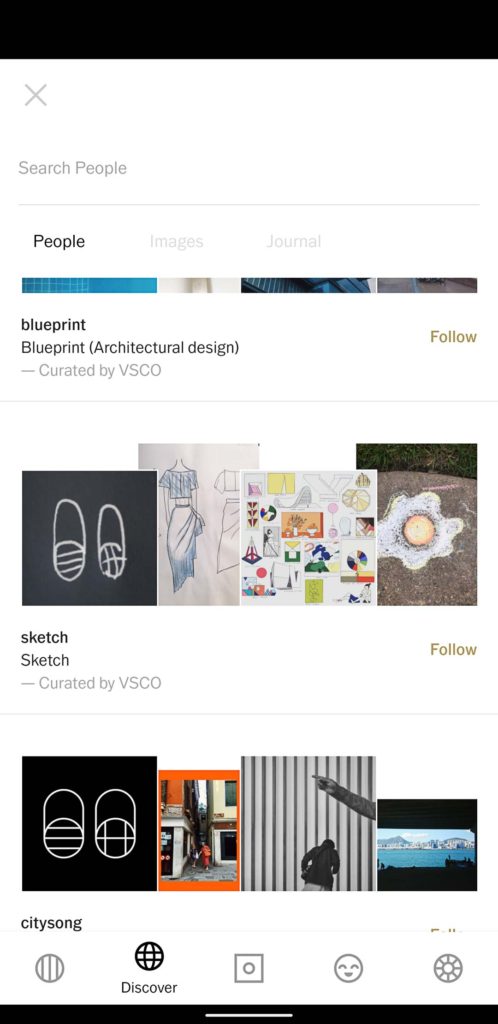
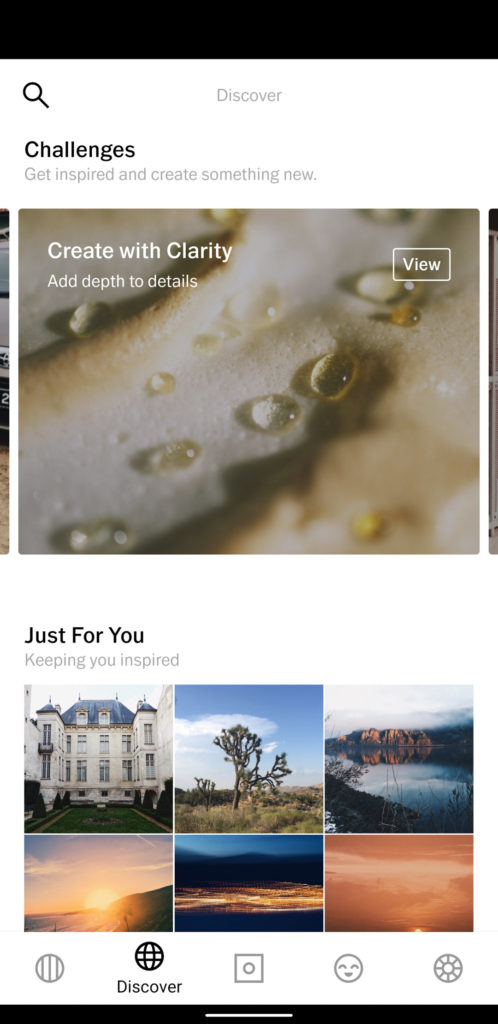
What is VSCO Discover?
In Discover you are given several options. By default you can view the content that is curated by VSCO. As of July 2020, some of these categories include: Just For You, Editorial, Selects, #nature, Humankind, and a list of others in random order. Discover is similar to the feed, except it is content exclusively curated by VSCO.
You can also search by People, Images, and Journal. However these searches are not very accurate, and a simple search will result in a wildly varying or inaccurate results.
If you are a VSCO X member you will also have access to weekly VSCO challenges in the discover tab.
Personal Opinion: I never use the Discover tab. Ever. I find the content there generally uninspiring, and I never turn to VSCO to view photos or other media. I suppose some people look at this stuff, but I’m not interested.
VSCO Challenges
Challenges are weekly photo challenges that inspire you to create something new.
vsco
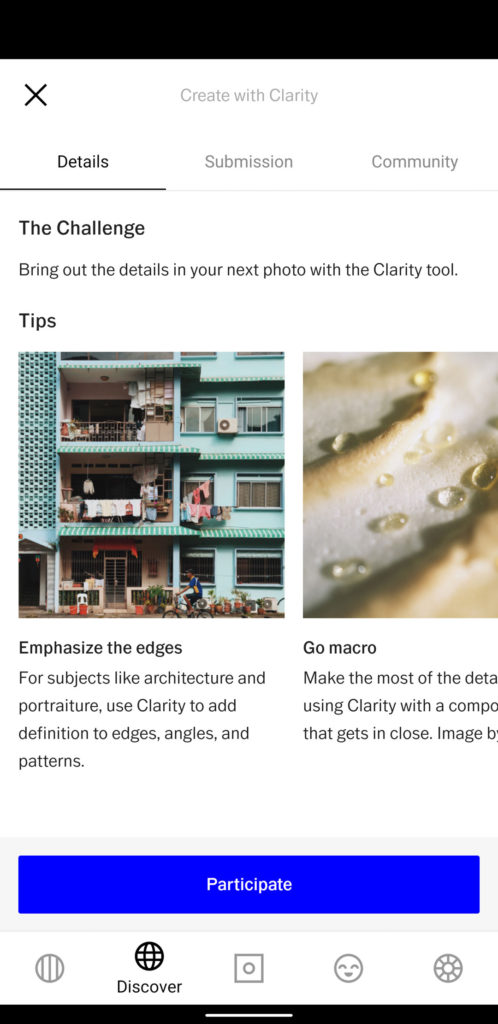
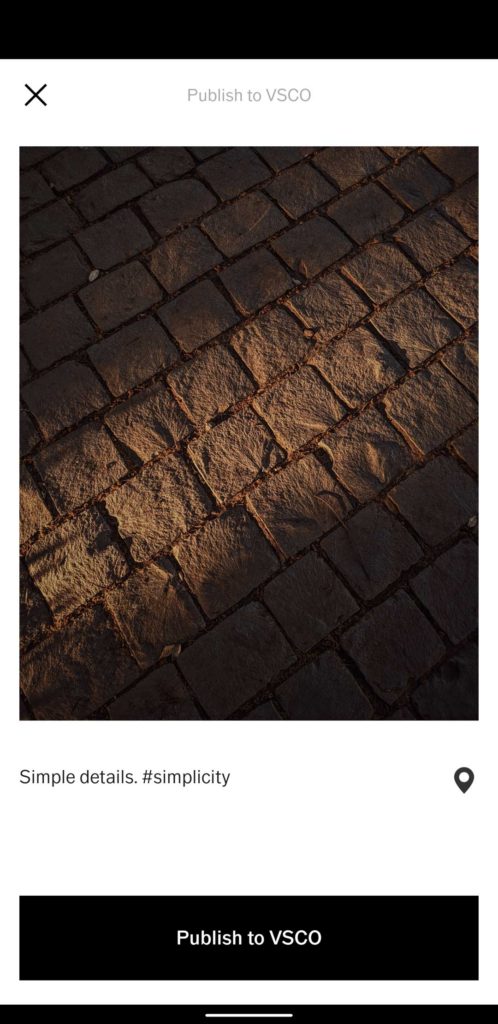
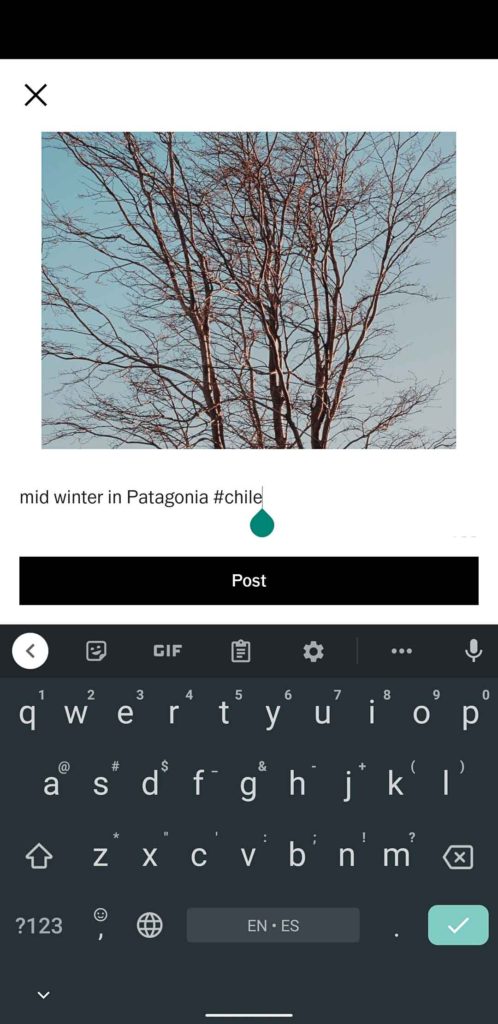
To submit a photo to a challenge tap Participate to begin. Select a photo from your studio or import a photo from your camera roll or gallery. Make any desired edits to the photo, then tap Next.
Add a caption and hashtags if wanted and tap Publish to challenge.
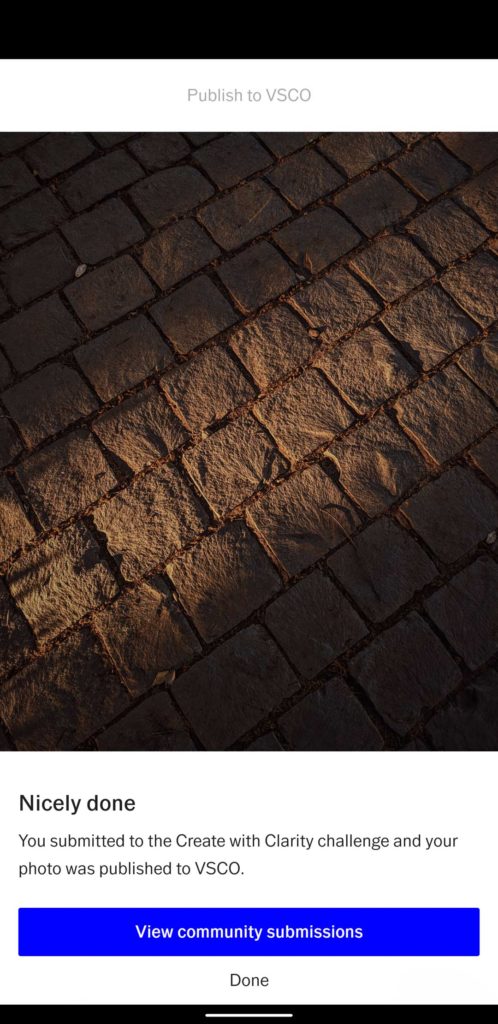
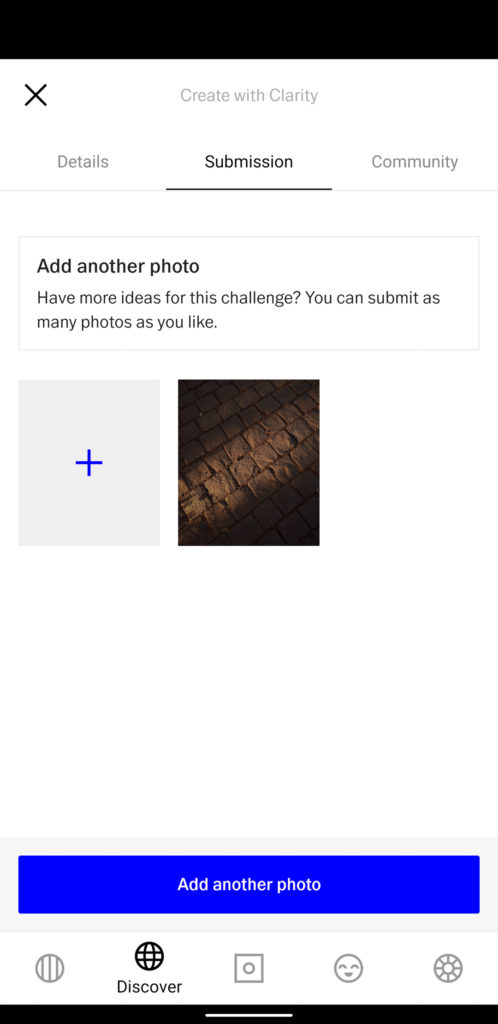
Once your photo is published to a challenge you can see your submission, submit another photo, or view community submissions.
What is VSCO Studio?
VSCO Studio is where you can see and access all of the photos you imported into VSCO or took with the VSCO camera.
From your studio you can select photos to edit, save, or share. For me, the studio is the place I spend most of my time in the app. As a photographer, I use VSCO primarily to edit photos while I am away from my computer.
Before we get to presets and editing tools, let’s talk about three things:
- Non-destructive editing
- Recipes
- Copy/paste editing settings.
If you have a set of images that you want to batch edit VSCO thankfully makes this super easy. Here’s how it works.
- Make edits to one of your images until you’ve got your look dialed in, and hit save.
- Then go back to your grid and select the images you want to edit.
- With them selected touch the menu and select paste edits.

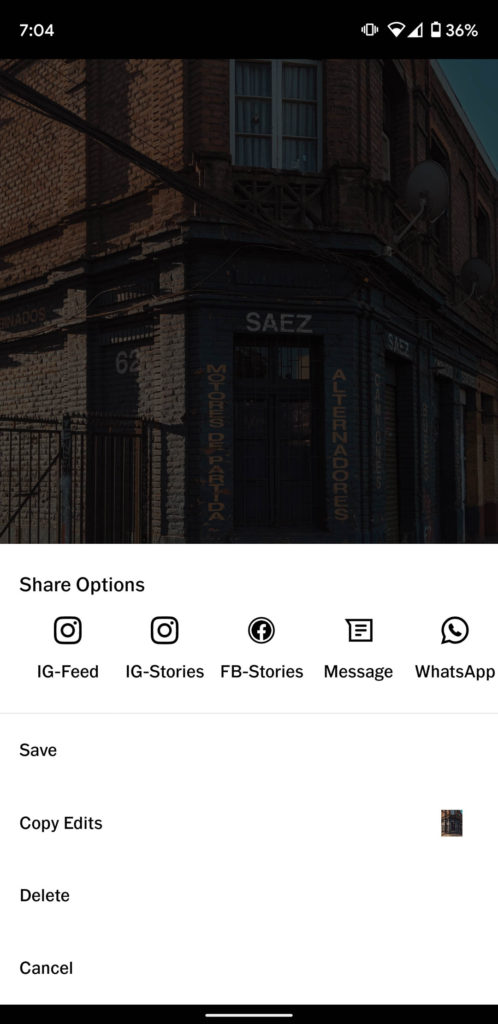
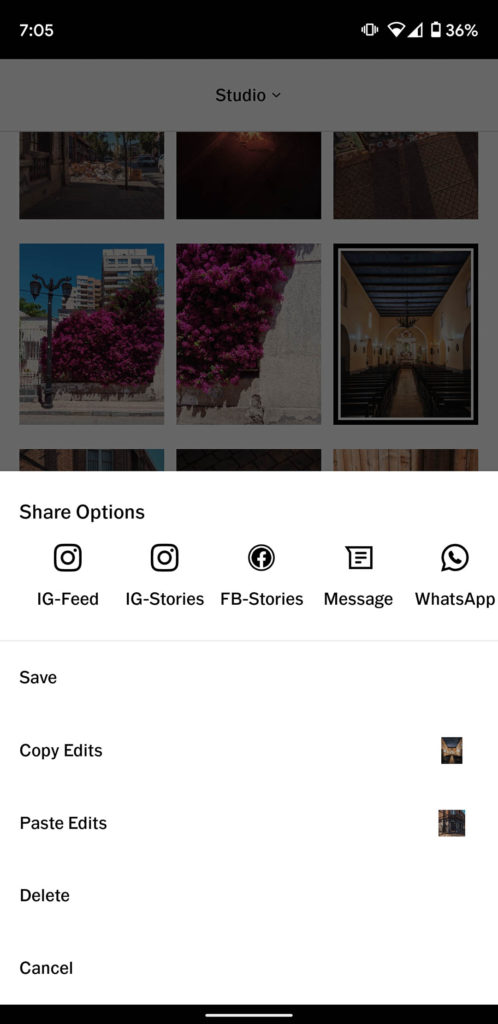
Just like that all of the photos you selected will have same set of edits applied to them in a just a few seconds.
Keep in mind that this method copies all of the edits made. So to save time I wait to apply individual edits that I know might be different for each photo like exposure, cropping, or perspective until after I copy and paste the batch edit settings.
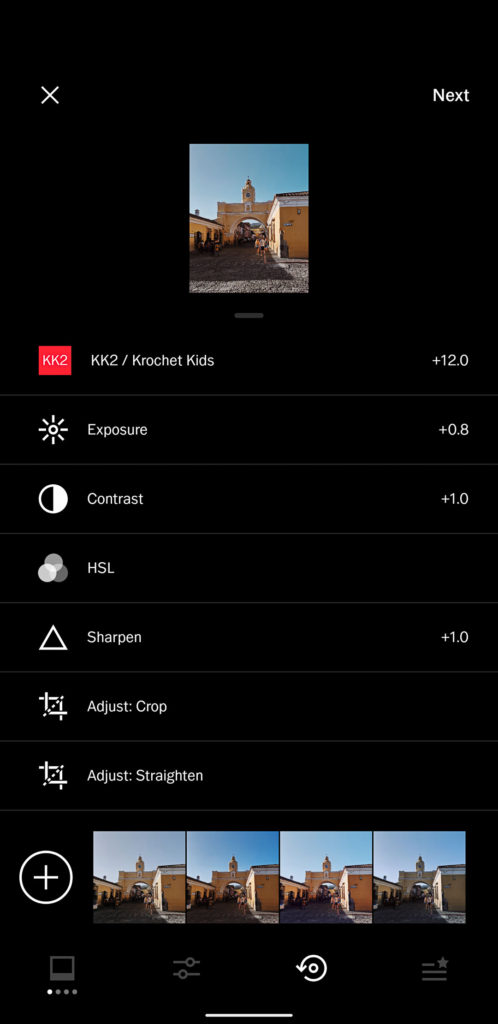
The other great thing about this is that the edits for each photo are saved in the history and you can go back in and delete the edit, or individually adjust it as needed. All editing is non-destructive, meaning it is fully adjustable without image quality loss that comes from saving and re-saving a jpeg. You can continue to tweak your adjustments until you have exported that photo out of VSCO.
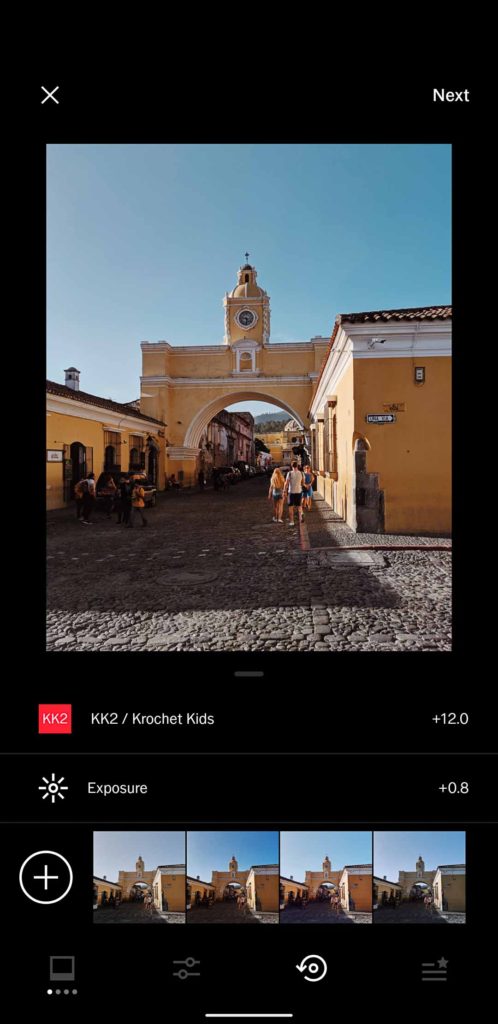
Finally, if you’ve created a look you really like from a combination of edits, you can save that look as a recipe (think preset) to apply to future images. Unfortunately this feature feels underdeveloped as there is no way to name or organize the recipes. Instead you’re given a tiny white button with a circular thumbnail of your current image.
If I have multiple recipes, I have no idea what recipe I’m applying and no way of knowing which one it is and what kind of images it might work well on. However, I am listing this feature as a strength for right now and hoping it’s just a result of the poorly designed interface. The idea of creating unique recipes is appealing, it’s just not fully thought out and developed by VSCO. I end up just using the copy/paste edits feature as my way of saving an edit combo (preset). If there’s a way to better work with recipes, it is not apparent or intuitive.
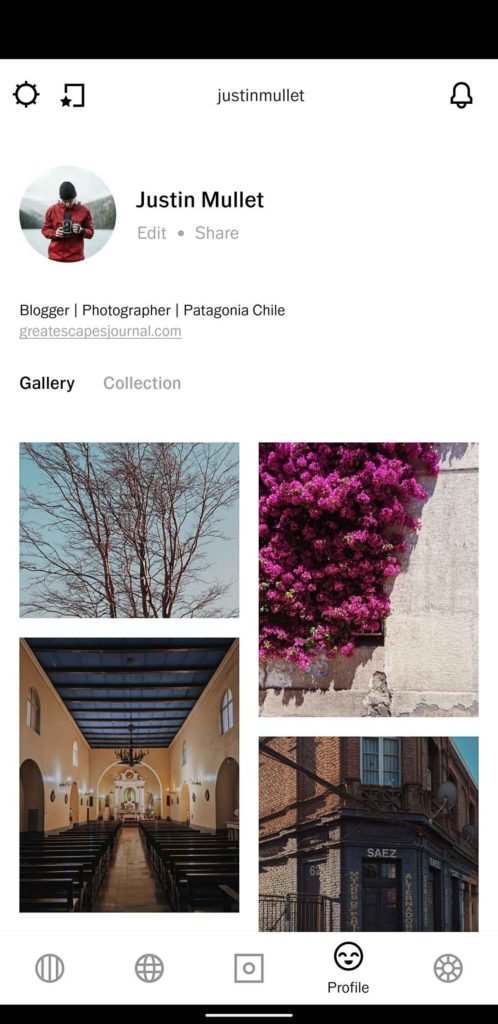
What is a VSCO Profile?
The VSCO profile is a straightforward profile page for the photos that you have uploaded or published to the platform. It’s a similar profile to other social media apps, where you and others can see your bio, URL, gallery and collection.
Underneath the bio and URL there are two tabs in your profile. The first one, the gallery is the set of photos that you have uploaded through the app. The next tab, collection is a set of photos from other users that you have re-posted to your feed. You can think of this as a way to save photos that you like or as a way to curate certain themes or images to refer back to and share with your followers.
What is a VSCO Membership?
A VSCO Membership costs $19.99 USD per year and includes: The entire VSCO ollection of 200+ VSCO presets (the latest VSCO classic and Film X presets) and new tools such as HSL, Borders, and Video Editing.
VSCO Filters (Presets)
What Are the VSCO Classic Presets
VSCO classic presets make up the bulk of the 200+ VSCO presets. Essentially they are more basic presets that lack the character and warmth slider of the Film X Presets. They are designed by VSCO and occasionally in collaboration with other brands or creators.

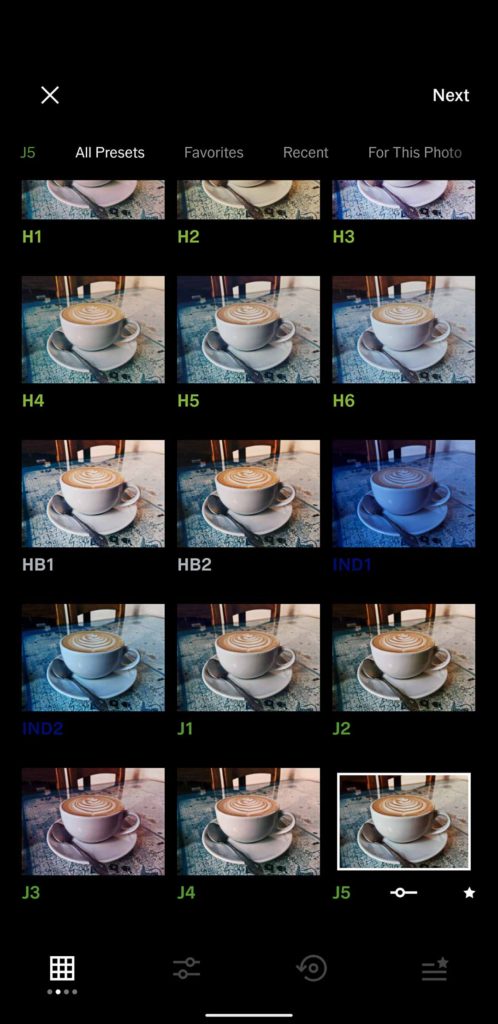
The first 10 presets that VSCO released in their app were named with numbers from 01 to 10. These are the original presets, and are still available within the app. As time went on VSCO released more and more packs of presets.
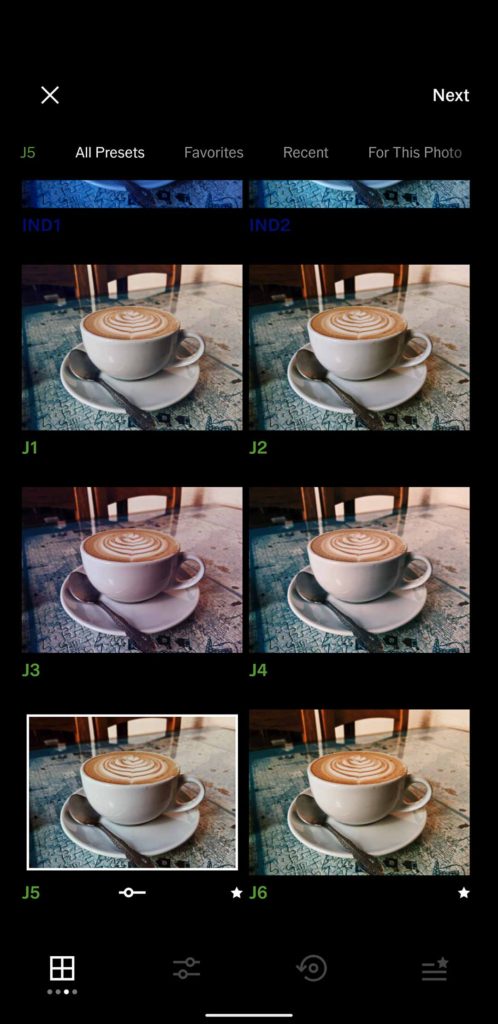
Popular Presets
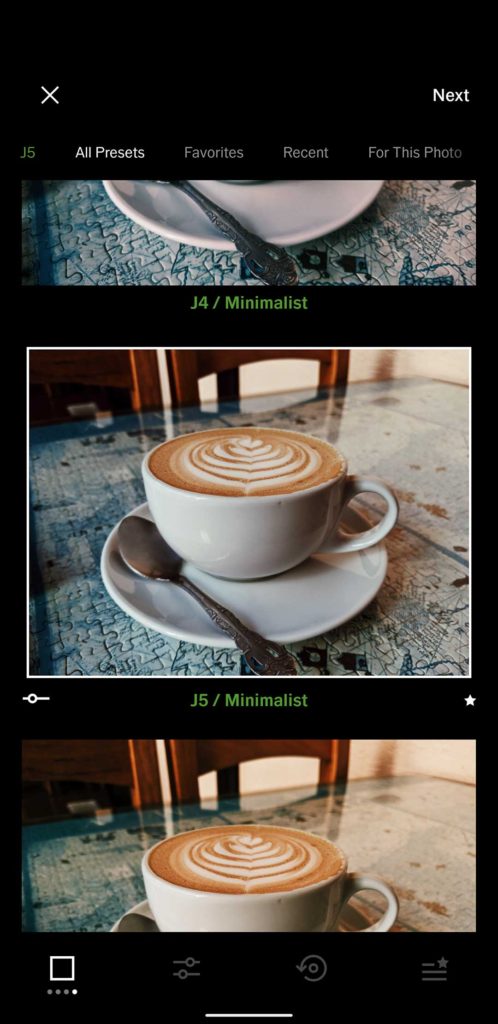
Some of the more popular packs were the M (Mood) Series, C (Chromatic) Series, and the J (Minimalist) Series. All of these can still be used today and remain some of my favorites.
Personal Favorites
M5 C7 J5
Classic presets can be applied to both photos and videos. You can adjust the strength of a preset after applying it by touching the preset icon again. A slider will appear allowing you to adjust the strength in 0.1 increments from 0 to 12.
The classic presets were instrumental in building popularity for VSCO. Soon after Instagram became wildly popular with photographers, the hashtag #VSCOCAM was used with millions of images eventually being shared with this tag. VSCO is largely responsible for the moody, faded, editing trends of popular PNW Instagram photographers and early influencers.
The “VSCO” look that came from the early classic presets were crushed blacks, faded highlights, and muted colors. Remnants of this editing style can still be found all across the internet. The trends have turned however to more contrast, true whites and blacks, and bright vibrant colors.
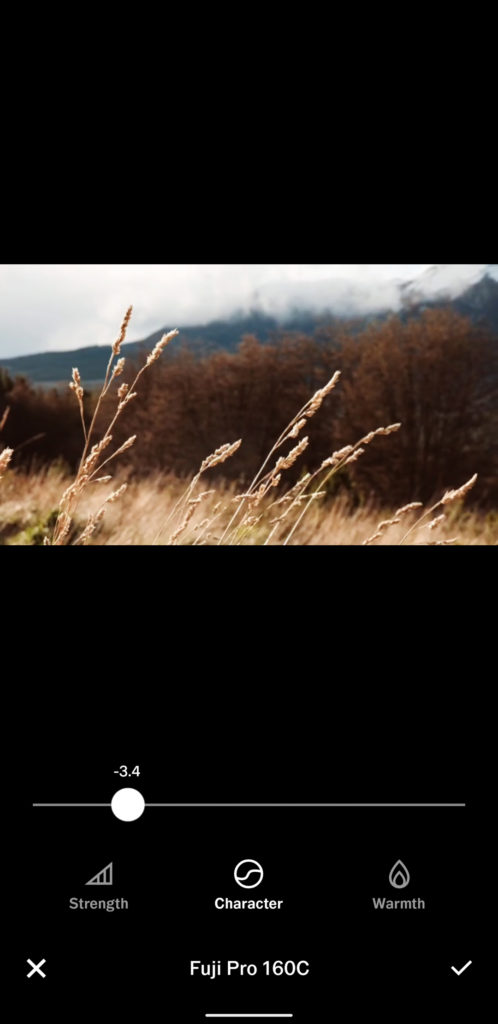
What Are VSCO X Film Presets?
VSCO launched Film X in December 2016. With the launch of the $19.99 annual membership, VSCO included access to the entire collection of classic presets, and launched a new membership only pack of presets called Film X Presets.
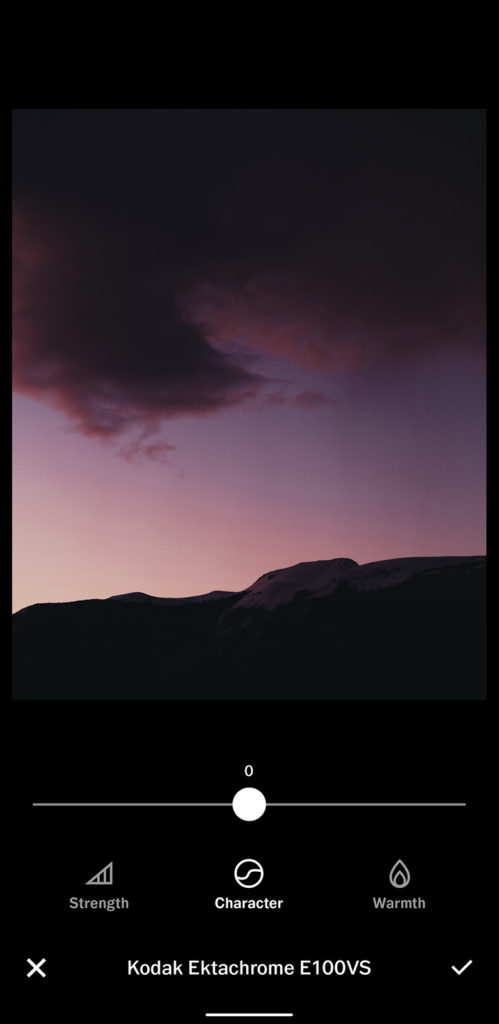
These presets were marketed with the names of existing or discontinued actual film stocks. With the film x presets includes a more granular control of the “look” on your photo or video. In addition to adjusting the strength of the preset, you can adjust the character and warmth of the film look.
You can read a review of the KA3 film X preset in this post below.
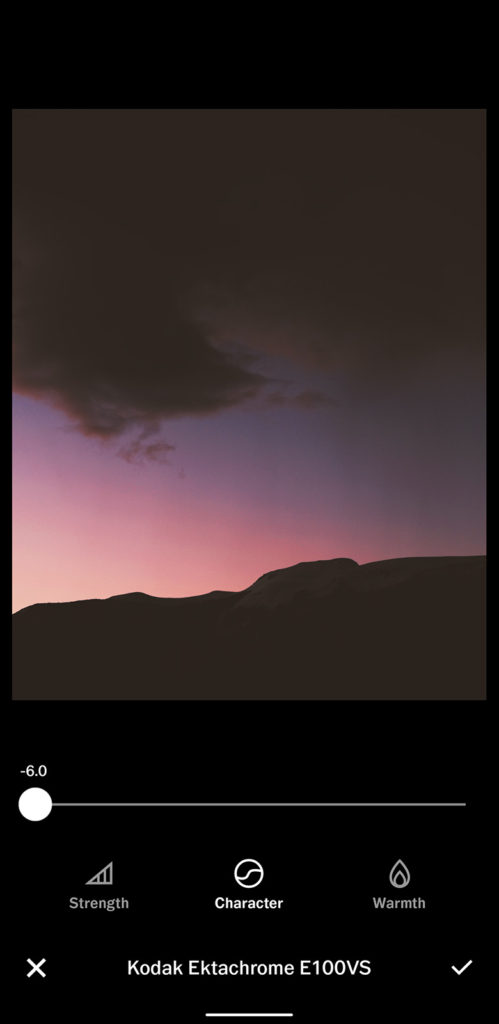
What Is VSCO Character
Adjusting the character slider of a Film X Preset is like emulating physical differences of a film stock. For example, if you are shooting film in really cold weather it may look different when it gets developed than film shot in really hot weather. Humidity, age, and how the film has been treated all affect the final photo. When you adjust the character in VSCO, it is an attempt to recreate the various looks you may achieve with actual film.
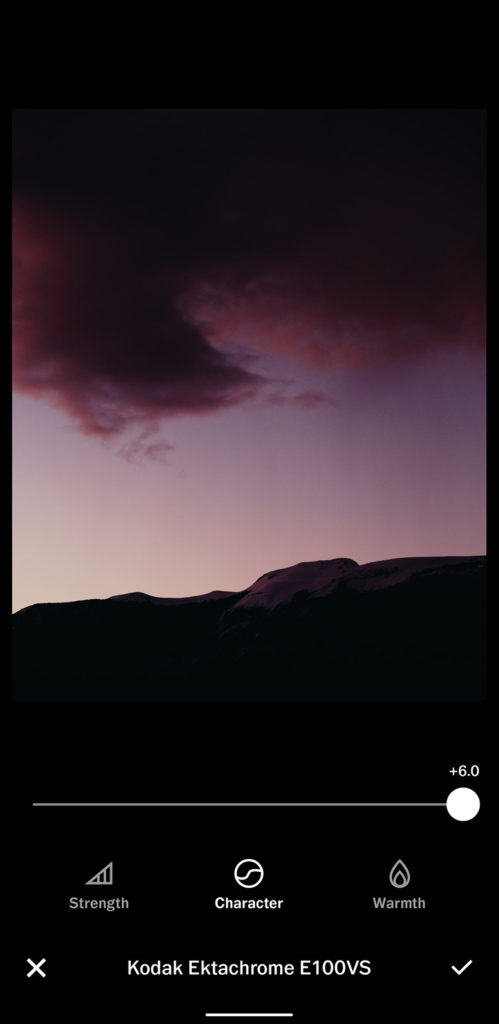
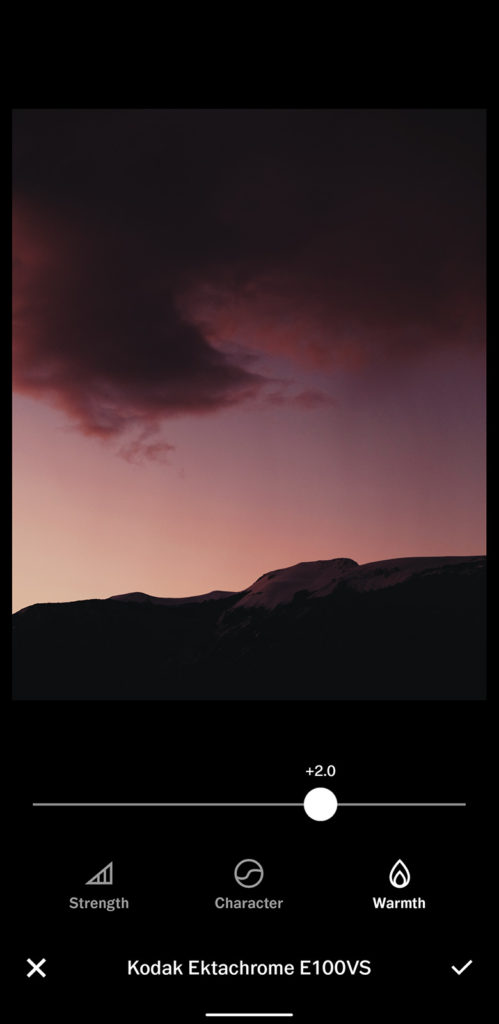
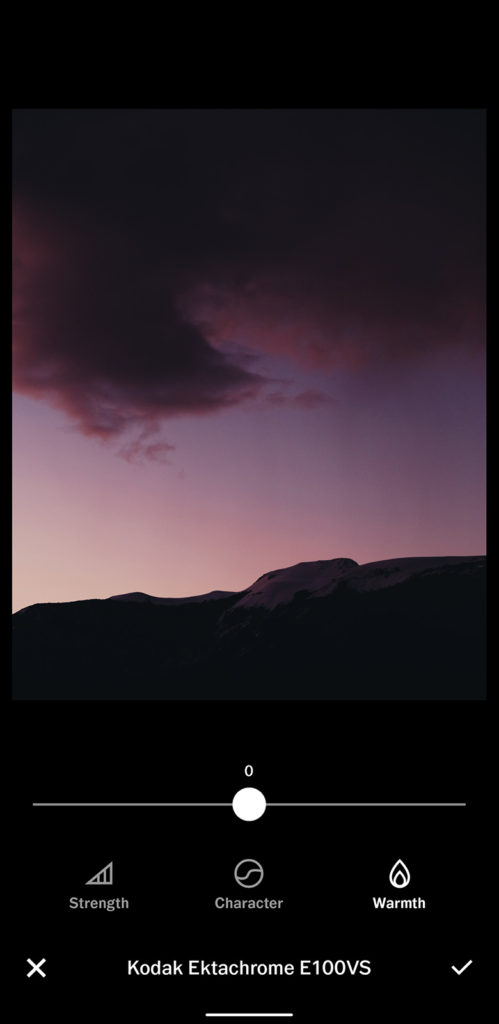
Adjusting Warmth
Adjusting the warmth of a Film X Preset gives you the opportunity to create the correct white balance before you work on the rest of your edits. Imagine that you shot the photo on a film camera. The film will handle the light in a “correct way” based on the science behind the emulation. By the time you see the image the white balance will be taken care of. In VSCO X you can adjust that initial white balance along with the strength of the film preset before you edit the rest of the photo.
VSCO Editing Tools (Toolkit)
The VSCO editing toolkit is of nearly equal strength to VSCO’s high quality filters/presets. Many photographers admit that VSCO has great color science technology. Their developers have coded really accurate tools that retain a degree of subtlety when making adjustments.
The VSCO Toolkit is accessible at the bottom of the screen and scrolls left to write.
Exposure
The exposure adjustment in VSCO is straightforward and it acts like it should. In fact, VSCO has done an amazing job in creating this adjustment as it’s one of the most important things you will need to adjust.
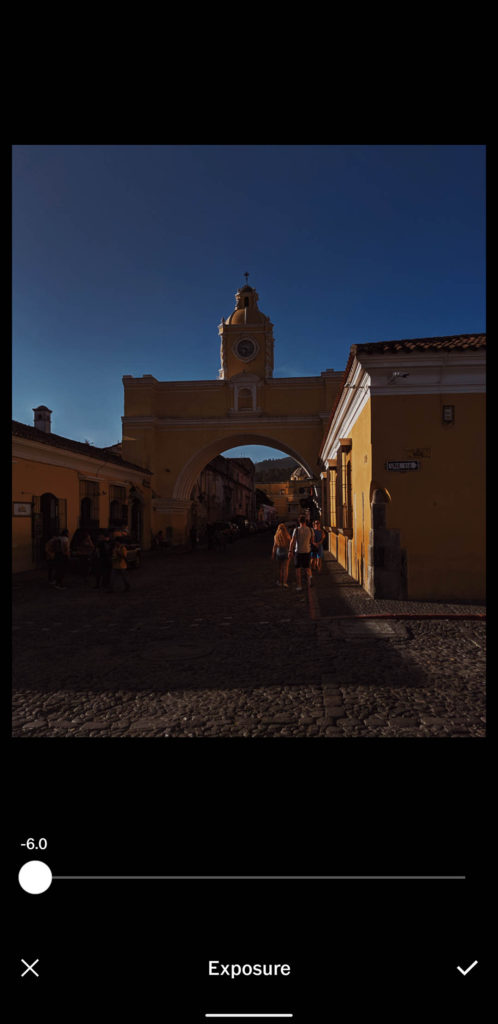
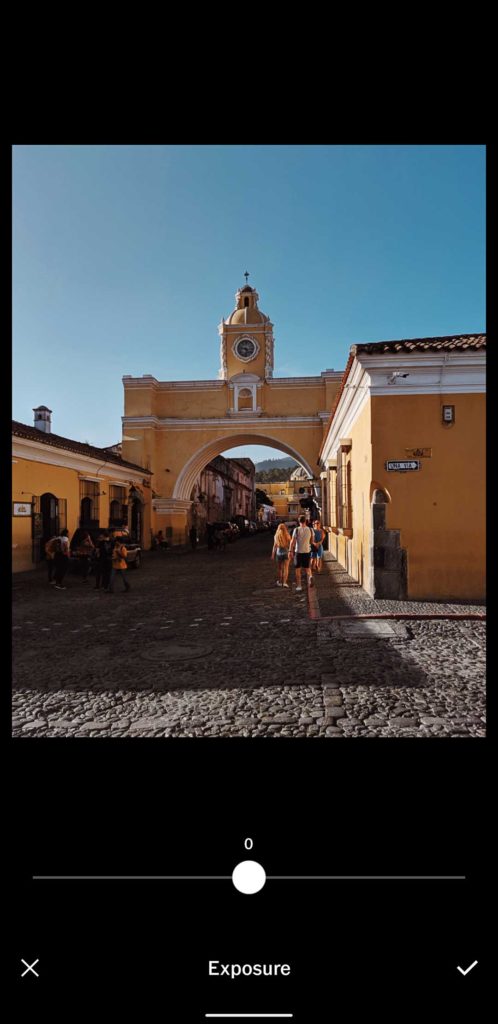
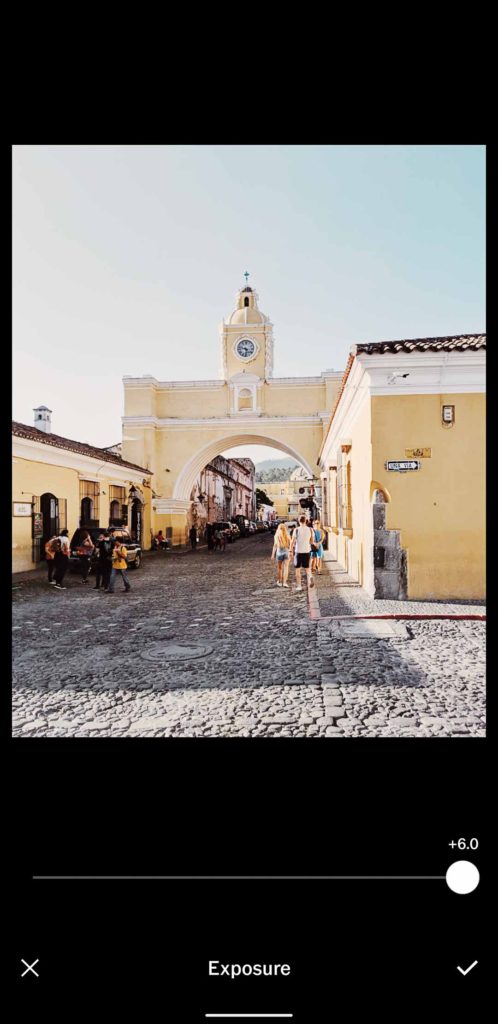
In almost any other native photo editor, and even other popular apps, the whites, midtones, and shadows would be entirely destroyed if you cranked up the exposure too high. But VSCO seems to individually adjust tones to mimic actual exposure change rather than global brightness. It does a really good job at shifting the saturation of the image in a natural way when you dial it up or or down. Their exposure adjustment is accurately labeled and works as a photographer would expect.
Contrast
Contrast adjustment is straightforward and like most of the other sliders gives you a range of -6 to +6.

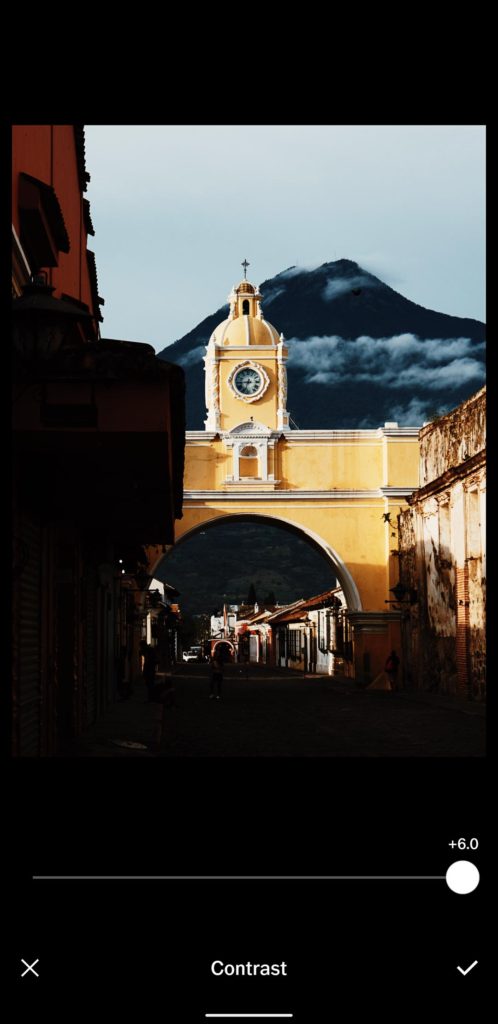
Increased contrast deepens the blacks and increases the whites. Decreased contrast does the opposite in softening the shadows, and reducing the brightness of the white parts of the image. You can think of contrast as an adjustment from a flat gray to stark black and white. Obviously 99% of the time you’ll want to find yourself right in the middle.
Adjust
Adjust includes four functions: crop, straighten, X perspective, and Y perspective.
The crop function has has 5 built-in ratios including: 1:1, 2:3, 3:4, 4:5, and 16:9. These can be used in either portrait or vertical orientation. You can also crop to a custom ratio by simply not selecting any of the preset ratios, and dragging the corners or edges of the cropping box.
Straightening a photo is straightforward but difficult to use. VSCO if you’re reading this, consider increasing the granular control of this slider. It’s really difficult when you’re trying to be precise and make only small adjustments. Other than this, the function works perfectly and is something everyone should be using.

Sharpen
When your camera takes a photo it’s processor automatically sharpens the image when it is converting the sensor data into an image.
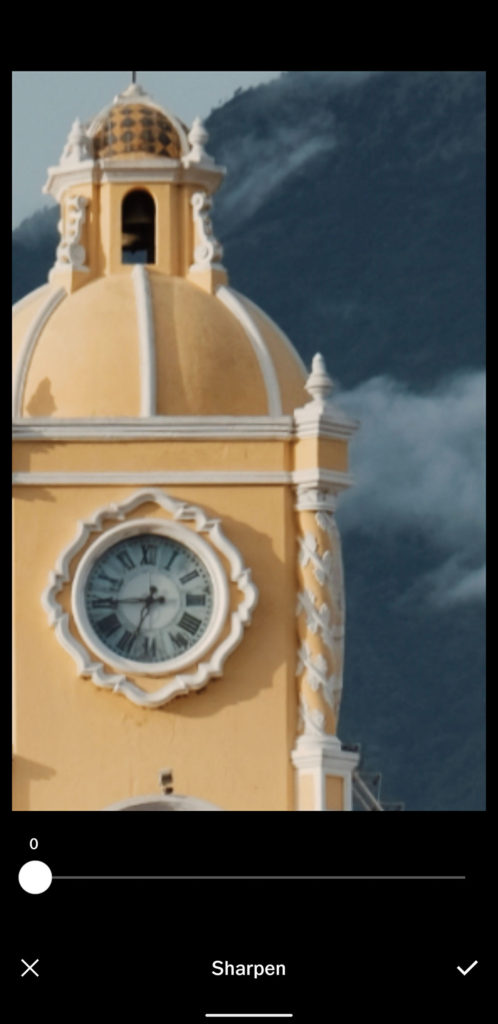
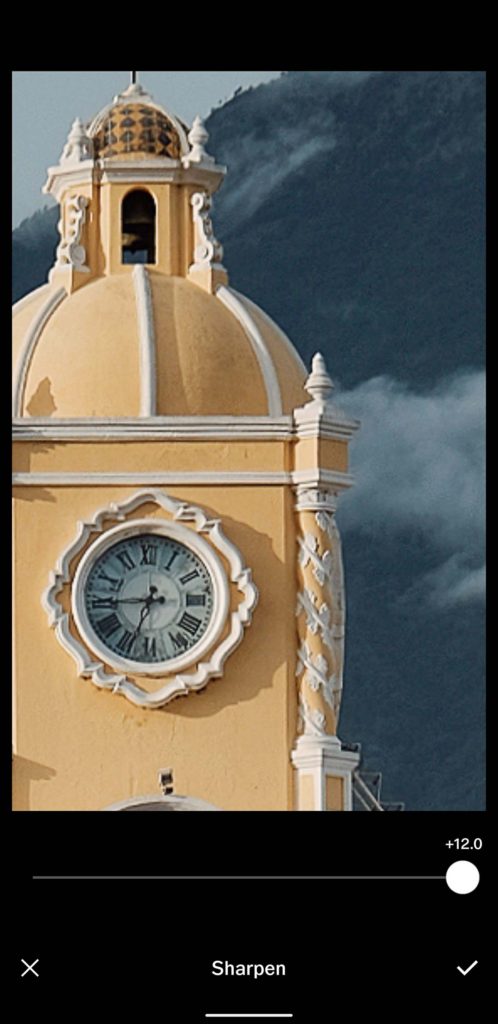
However it is not always enough. When you apply the sharpening tool it can increase the visibility of the very small details in the image and improve the micro contrast in order to improve the overall image.
Saturation
The saturation tool in VSCO lets you adjust the intensity of the colors in your photo in order to correct the photo or express your artistic vision.
Tone (Highlights/Shadows)
The highlights and shadows tone tool let’s you lift the shadows, and lower the highlights. This tool does the opposite of the contrast tool. If you’re shooting normal jpg photos on your phone however, they don’t always render very well if you overuse this tool.
White Balance
White balance (WB) adjusts the temperature and tint of your photo. The temperature slider adjusts the tones from blue to orange, and the tint adjustment goes from green to pink. Different temperatures often help convey a different mood or feeling in your photo. Adjusting the white balance can be useful to correct a photo, or create a mood that matches your artistic style.
Skin Tone
The Skin Tone tool adjusts the hue of orange, yellow, and brown tones. Depending on the light or reflections in a photo a person’s skin tones can look unnatural. This is a simple adjustment to move skin tones from a more yellow hue to a more red/orange hue. This same adjustment can be made in the HSL slider by playing with the oranges/reds.


Clarity
Clarity is an adjustment similar to sharpening but with a larger adjustment ratio. Increasing clarity, increase the micro contrast of the visible edges within a photo. It helps increase the detail in a photo that is very flat in contrast or lacks definition. Be careful with this tool: It is easy to overdo it and it will leave your photo looking very digital or edited.
Vignette
Vignette creates a darkened circle around the outside edges and corners of your photo. Most lenses, and especially lenses from years ago created a heavy vignette around the outside edges of the frame. This was technically an engineering short-come of many lenses.
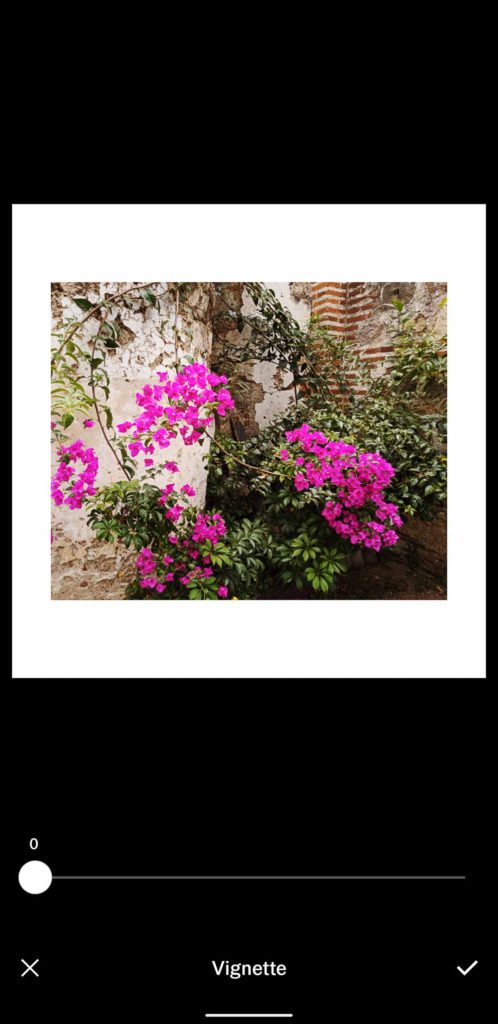
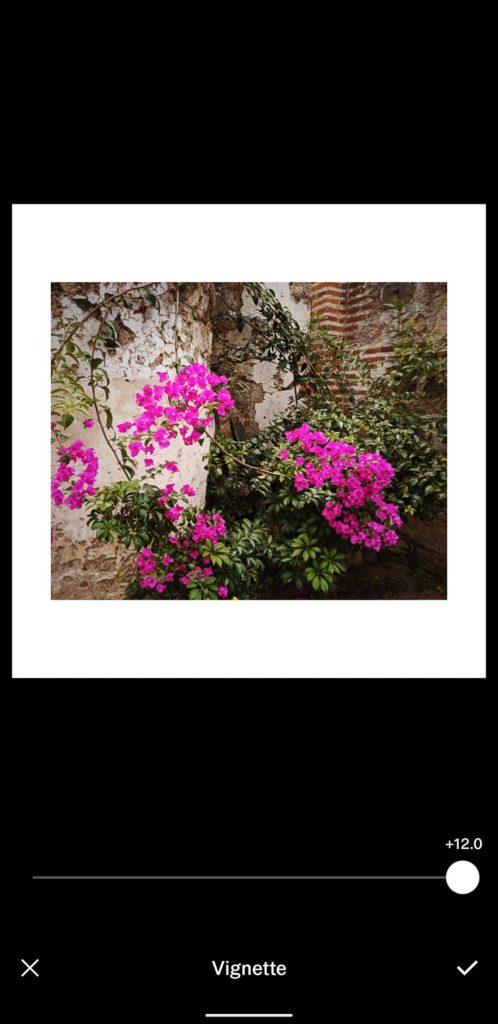
If you want to recreate this look with your modern smartphone camera, this is the proper tool for that.
Grain
Grain adds artificially created “film grain” to your photo. It is a global adjustment and affect the shadows and highlights equally.
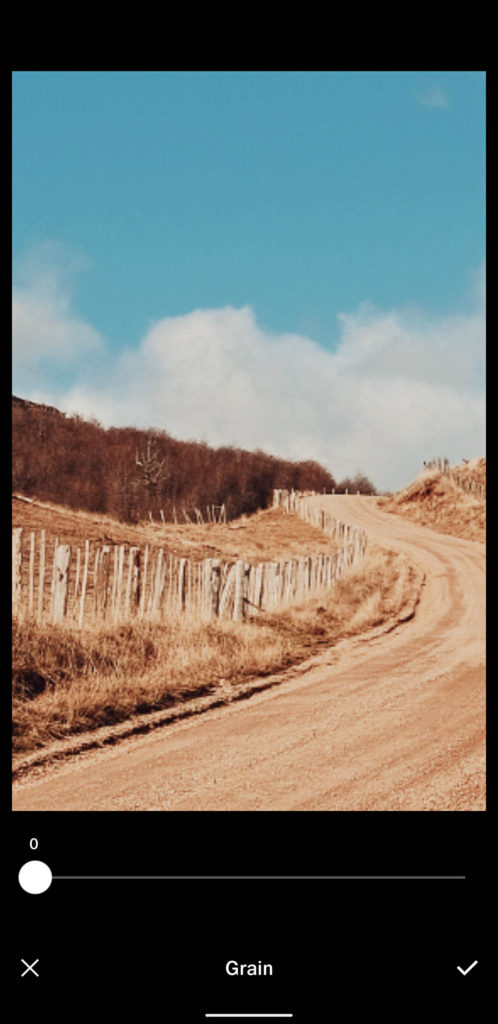
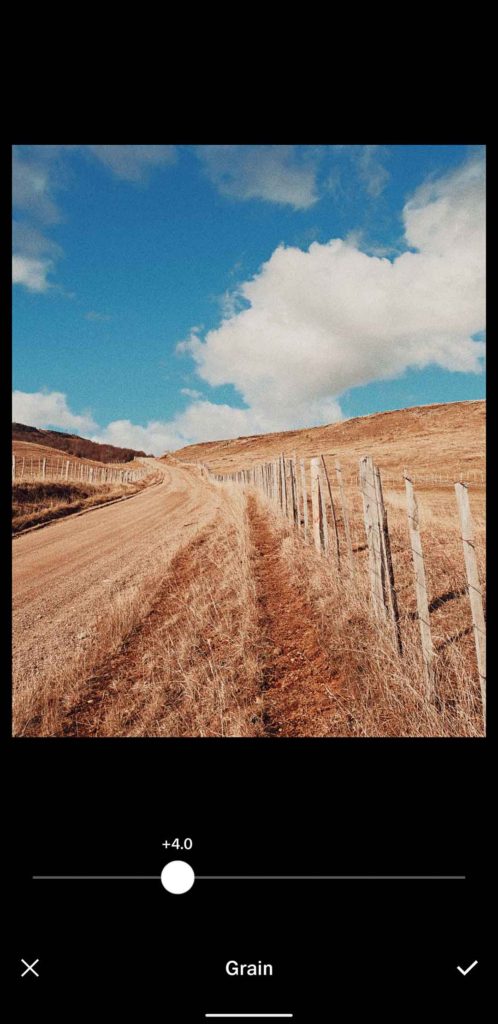
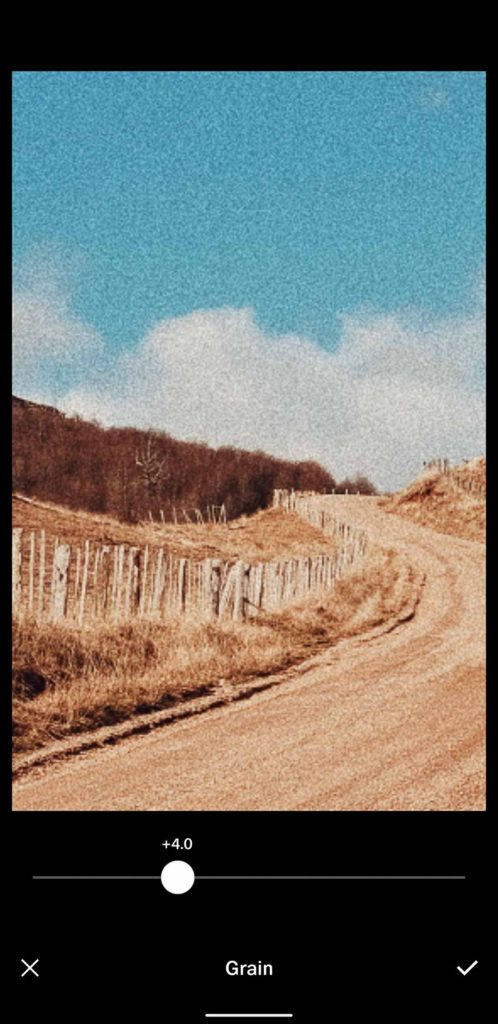
In the same category as the vignette tool, the grain adjustment does not correct a photo, but instead enhances a specific look or recreation of old-time cameras and film.
Fade
The fade tool creates a look very popular with PNW Instagram Photographers from a few years ago. This tool “crushes” the black tones. It fades the black tones to varying degrees closer to gray. It can look artistic, but this tool is rarely used to correct a photo.
Split Tone
Split tone allows you colorize the highlights and shadows of your image with different tones. For example, you could make your photo have blue shadows and orange highlights. If you want your sunset to have a bit more color, you could add orange or red to the highlights and leave the shadows neutral. Used carefully, this tool can add that extra pop of color or balance to your photo.
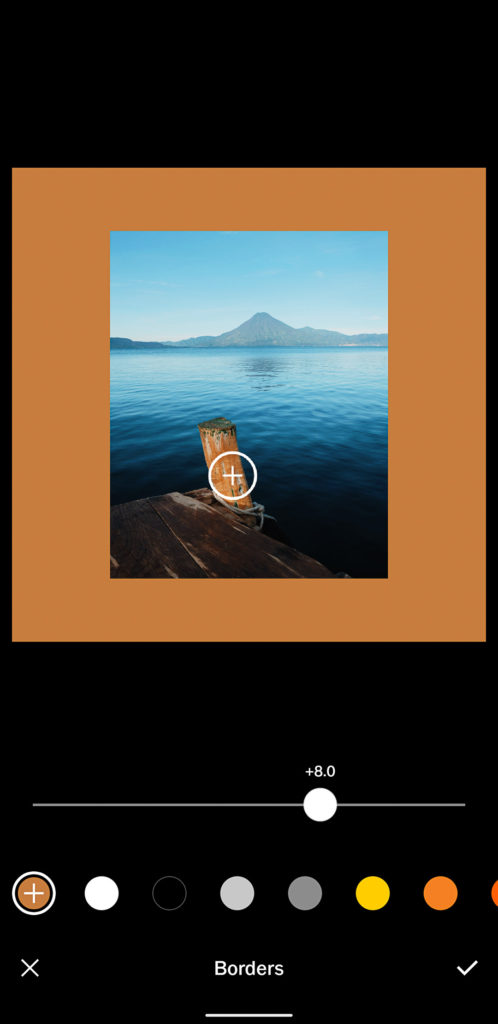
Borders
The borders tool places your photo on a square mat. Unless your photo is already square it does not create a uniform border around your photo like you might expect. You are given 17 preset colors to choose from. However, thanks to a recent update you can now select the [+] icon to activate a color picker, and select from any hue within your photo.
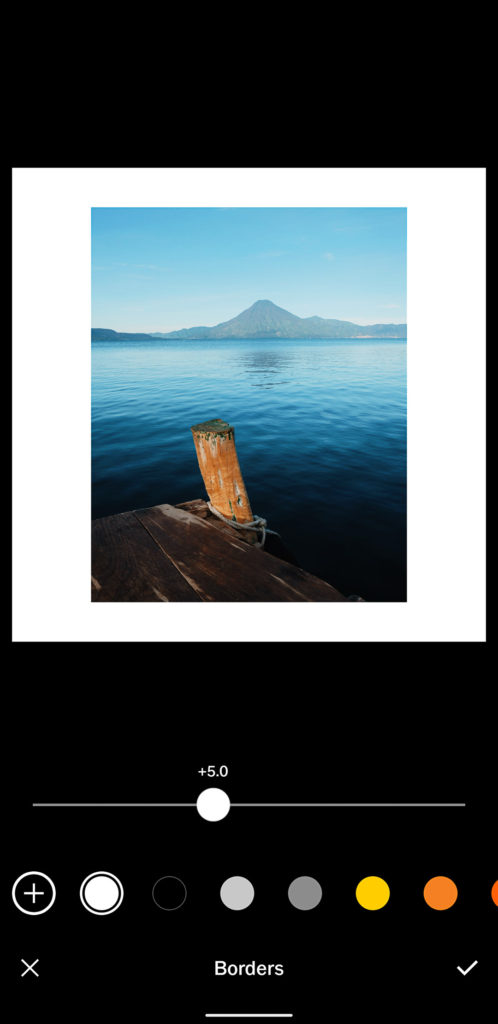
BONUS TIP: I have almost always like editing photos against a white background. When I can frame my photo with white, I feel like I get a better sense of color, and it helps me see what I’m doing more accurately. I edit this way in Lightroom on my computer and it helps me make better color choices.
The first thing I do is make a white frame around my photo in VSCO. Then I complete the rest of my edits.
It’s important to me that the colors in my image complement each other, and I can get a better sense of this when the photo is smaller and bordered with white. I have a theory that the reason I see better in white is because that’s how I most often view photos. If I print, they have white borders. Instagram is white (when it’s not in dark mode), this website is white, and even the best days of Flickr, photos were placed on a white background.
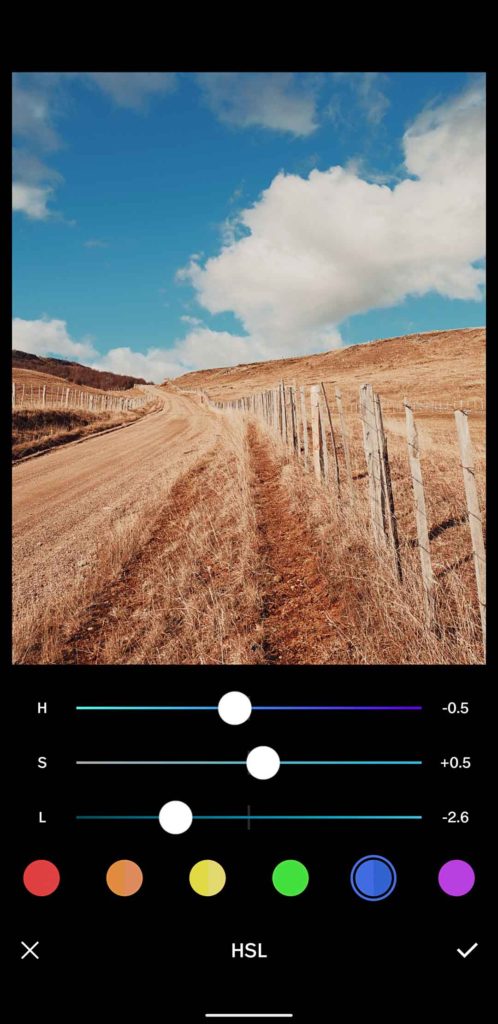
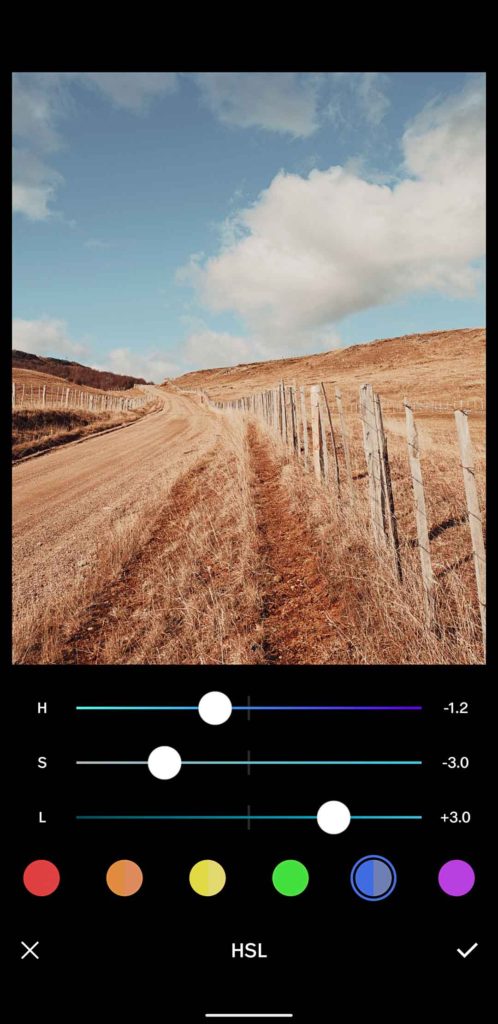
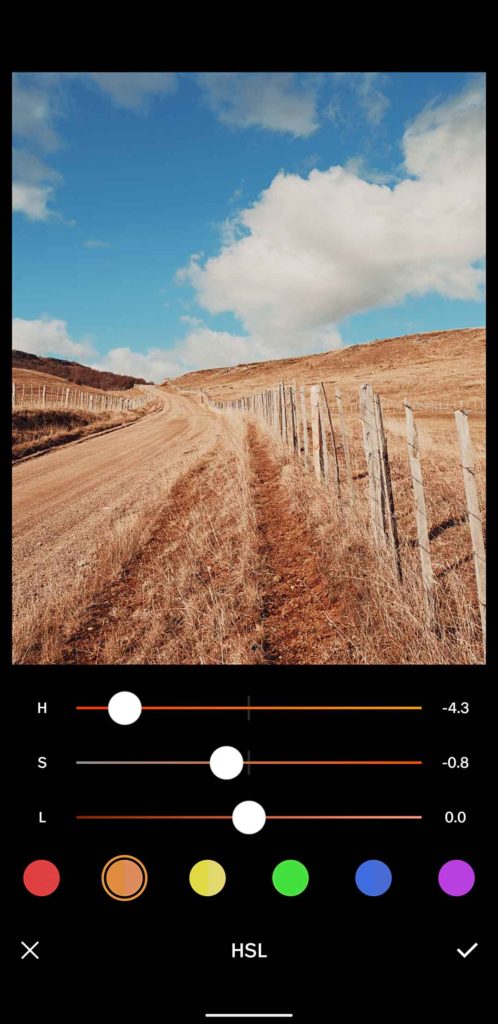
HSL
The HSL tool allows you to adjust the Hue, Saturation, and Luminance of 6 main colors: red, orange, yellow, green, blue and purple. This allows you to fine tune a photo and get much closer to the look you want. In some regards it replaces a traditional curves adjustment panel and gives you three easy sliders per color.
VSCO Camera
The VSCO camera allows you to take pictures from directly inside the app and have the photos show up in your editing studio without needing to import them from your camera roll.
It is a very simplistic camera.
On Android you can touch the screen to select the focus and exposure point. There are three options on the bottom of the viewfinder. There is a framing grid option that lets you switch between rule of thirds and square. There is a flash option that cycles between off, auto, on, and continuous (t). There is a square button with a circle inside of it that turns on the ability to touch anywhere on the viewfinder screen to automatically take a picture without using the round “shutter button”.
Beside the shutter button is a self-camera option, and a preview of the last photo you took that takes you to the last photo and lets you swipe right. When you click the X to leave this view it takes you back to the camera.
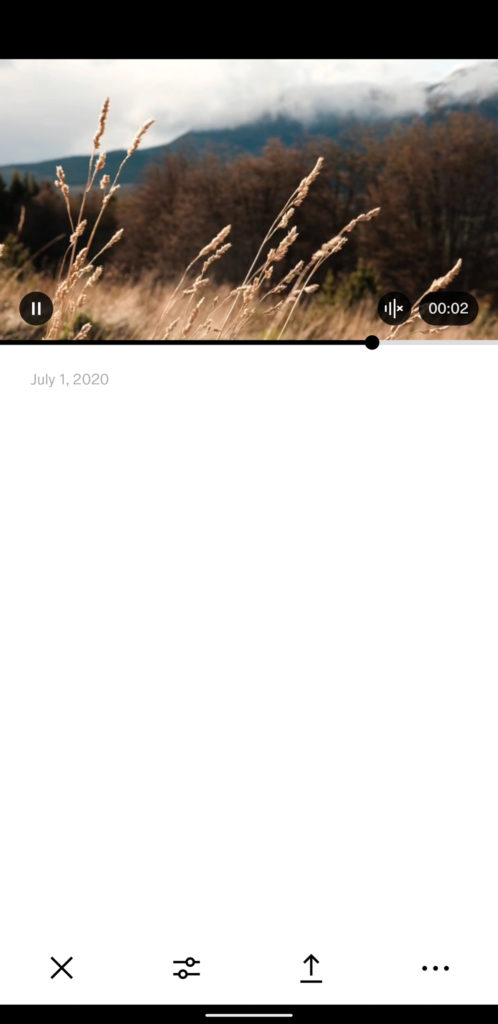
How to Edit Video On VSCO
You can edit videos on VSCO almost as easily as photos. I say almost just because of how big video files tend to be. This leads to inevitable slow downs, or app crashes. I have not tested this on more than my Google Pixel 3 XL so I can’t say how it will work for you.
Importing and editing a video is straightforward and identical to the process for photos.
When editing videos you have access to all the classic and film presets included in VSCO. You also have access to all of the toolkit editing tools except for: adjust, sharpen, clarity, vignette, grain, and borders.
If you need to quickly color grade a video on mobile, VSCO is easy to use and does a realistic and subtle job if used carefully.
VSCO Social
The social aspects of VSCO include:
- a profile of your photos or videos
- a feed of other people’s photos or videos
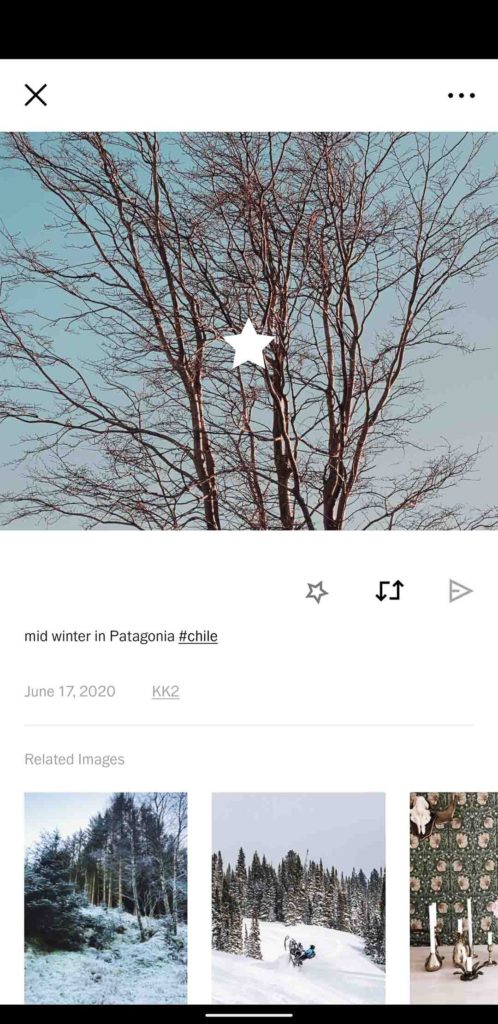
- the ability to repost, favorite, or star a photo or video
- the ability to send a direct message to another user
- ability to view photos by filter
To be honest I do not use the profile or feed on VSCO very often. I have very few friends who use it and I don’t hear about anyone engaging on this side of the app. It is really difficult to engage with because of a lack of comments, very slow image loading, and the confusing interface.
Typically, when I click over to my feed, I give up within a few minutes because photos simply do not load. It’s also impossible to be a part of the greater conversation around a theme or individual photo because there is no ability to comment. You can’t even send a direct message to a user that is specific to one photo, unless you first navigate to the person’s profile and then try to describe which photo you’re talking about in the feed. It’s a confusing, and leaves me feeling like it’s not worth the time.
Weaknesses
The Interface
The VSCO app interface is nice looking, but it’s confusing. I have the studio and toolkit figured out, but to be honest until I wrote this review the rest of the app was mostly a mystery. I have used VSCO for years, but it is still so complicated that I could not have told you how to use it without opening it up and walking through it myself. It’s not simple enough to describe without showing it at the same time.
Shadows and Highlights Tools
I may be the only digital photographer to ever use this, but I sometimes increase or push the highlights slider in Lightroom to make the highlights even brighter. In VSCO, the slider starts at zero, and only goes one way. I like the additional contrast that boosting the highlights gives, without making the shadows and midtones darker. It feels like a cheerier way of adding contrast.
Filter Intensity
I wish the default intensity of the filters would be set at the halfway point instead of the maximum. I would rather be able to see a subtle effect of a filter and then adjust it up from there if needed. The way it is now, you first see a strongly edited image. That subconsciously becomes the baseline, and it makes it harder for me to dial it back and edit with a more natural look.
VSCO Review and Final Thoughts
I have used VSCO for years and will continue to use it. For making color adjustments it is the best app I have used on mobile. It has given me no reason to look elsewhere.
If you can have the patience to deal with the clunky design you’ll find a powerful set of tools underneath


Thank you for this. I love VSCO and have been using it for a bit but still learned a couple new things through this read. I’m wondering if your file sizes get compressed every time you export out of VSCO? My images literally tend to be 4-5 MB at best. That is fine for small screens but it is no good for printing. Do you know how I can maintain maximum quality?
Thanks for the question! I am not sure on this. I am testing from a Google Pixel 3 XL and my exported photos basically match the file size of the originals. Have you tried importing a photo into VSCO, then exporting it again without making any edits? Perhaps, more changes you make on a photo, the harder it is for VSCO to retain file size? I’m not really sure on this, but I’ll check into it.
Hi Justin,
Thank you for this extended explanation of the VSCO app!
I was wondering if you every experience creative pains? So, if you are experiencing creative limitations when using the app? And do you feel you can grow from a hobbyist photographer to a professional photographer on VSCO? Do you think you can eventually earn money with it?
Hope you can help me with these questions!
Thanks in advance.
Cheers,
Suuz
Hi Suuz,
I definitely experience a lot of times when I lose focus, or have less creativity in photography. Finding something new to photograph, write about, or read often helps me to break out of these slumps. VSCO is only a tool in the bag of a photographer, but it can definitely be used to create marketable and commercial content. I have a quite a few photos in my stocksy portfolio that were shot and edited on mobile using VSCO (https://www.stocksy.com/justinmullet/galleries)
Thanks for the comment.
Thank you for the great information and review of VSCO. If I publish a picture in Central time zone, will my friend in MT see the timestamp in her time zone or mine? Or is that a setting you can change? Thanks!!
That’s a great question. I’m really not sure of the answer. It would be worth posting a photo and texting your friend to see what timezone appears.