
Mamiya C220 Review
My review of the Mamiya C220 film camera and shooting medium format film for the first time.

Photography Background
My background in photography began as a kid growing up in Minnesota.
Besides taking photos with my parent’s film cameras a few times, I had never shot film.
I bought my first DSLR as a teenager and have slowly upgraded over the years.
I began with a Canon Rebel XT and now have a Canon 6D and the new Fujifilm X-T30.
How to find used film cameras On Craigslist or Facebook Marketplace?
Save your search as a bookmark so you can easily and frequently check the latest listings. Finding a quality used camera like the Mamiya C220 on Craigslist is like searching for a rare book or gem. You’ve got to keep your eyes open and increase your chance for getting lucky.
About a two years ago I bought a Pentax KX 35mm film camera and a few lenses. Since then I’ve started dipping my toes into film photography.
About a year ago I bought my Mamiya C220 from a gentleman who listed the camera on Craigslist.
When I met him at his house to make the purchase, he proudly showed me baby photos he’d taken of his now 35 year old daughter.
He was excited that the camera, which he had kept in pristine condition, would be loved and used again.
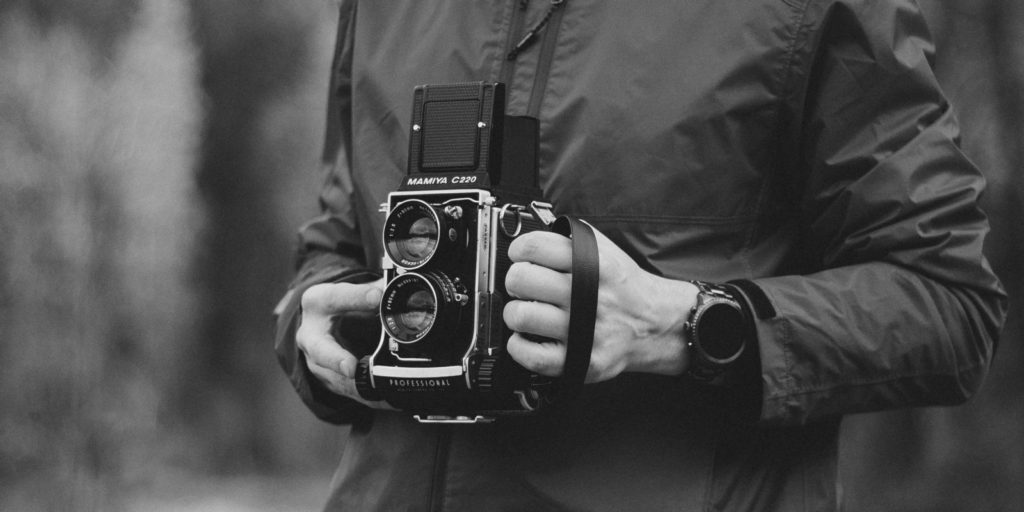
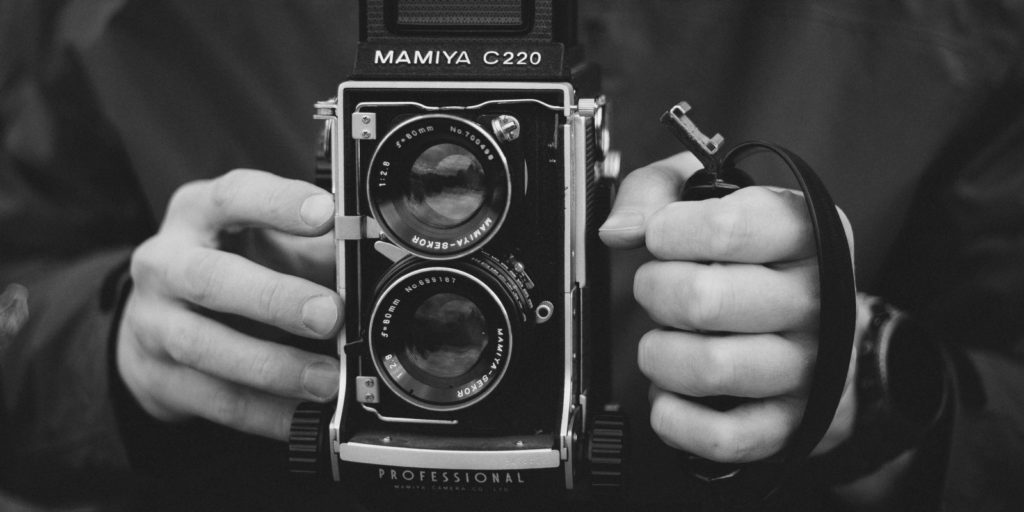
My kit includes the Mamiya C220, 80mm 2.8 lens, 135mm 3.5 lens, hand grip, flash bracket, and cable shutter release.
The camera takes medium format 120 or 220 length film, and exposes a 6×6 square frame.
I purchased three freshly dated rolls of 120 Kodak Ektar 100. Having just finished the first roll, I decided that it would be a good time to share my first impressions and thoughts.
How To Load Medium Format 120 Film (in Mamiya C220)
Thanks to YouTube, loading the roll of film was simple. I was fortunate enough that the prior owner of the camera left his last empty spool in the rewind chamber, so everything was ready to go.
Follow the steps below to put a new roll of film in the camera.
Time needed: 3 minutes
How to load a Mamiya C220
- Open up the back of the camera.
Carefully open up the back of the camera. The used roll of film will be wound up on the top spool.
- Carefully straighten out the used roll and remove it from the camera.
The roll might not have wound up perfectly straight. Straighten it then take it out of the camera holding it tightly so it doesn’t unroll.
- Use the built-in adhesive and seal the old roll.
Carefully remove the adhesive cover and use the tap at the end of the roll to seal the roll shut tightly on the spool.
- Take out the empty spool.
The empty spool will be in the bottom chamber. Carefully take it out of the camera. Undo the adhesive and carefully place the end of the new roll of film through the slot in the center of the old spool.
- Secure the film to the empty spool.
Use a small piece of scotch tape to secure the film to the empty spool. Make sure the film is squarely lined up with the spool.
- Load the new roll into the bottom chamber.
Carefully position the spool with the new roll into the bottom chamber of the camera.
- Load the empty spool into the top chamber.
With the film end attached to the empty spool carefully place it in the chamber at the top of the camera. Make sure the film spool is lined up with the winding mechanism of the camera.
- Find the winding wheel on the right side of the camera.
Begin slowly winding the film to tighten it and ensure it is winding onto the new spool.
- Wind the film until the arrows match the red dots on each side of the film.
The paper backing on the film has arrows to show when to stop winding the film. Match the arrows on the paper backing to the red dots on either side of the film chamber.
- Close the door and wind the film.
Make sure the door is locked. Then wind the film advance 4 to 5 revolutions until it stops winding and a number 1 appears in the film counter.
With my Pentax 35mm camera it’s always a bit of guess where the first usable frame on the negative is, so I have often have the #firstoftheroll effect on that initial frame.
With this camera, you load the film to the arrows on the backing paper, and then crank the film advance knob until it stops turning. The frame counter will read “1” and you are ready for your first exposure.
With 120 length film, you are able to take 12 exposures on one roll.
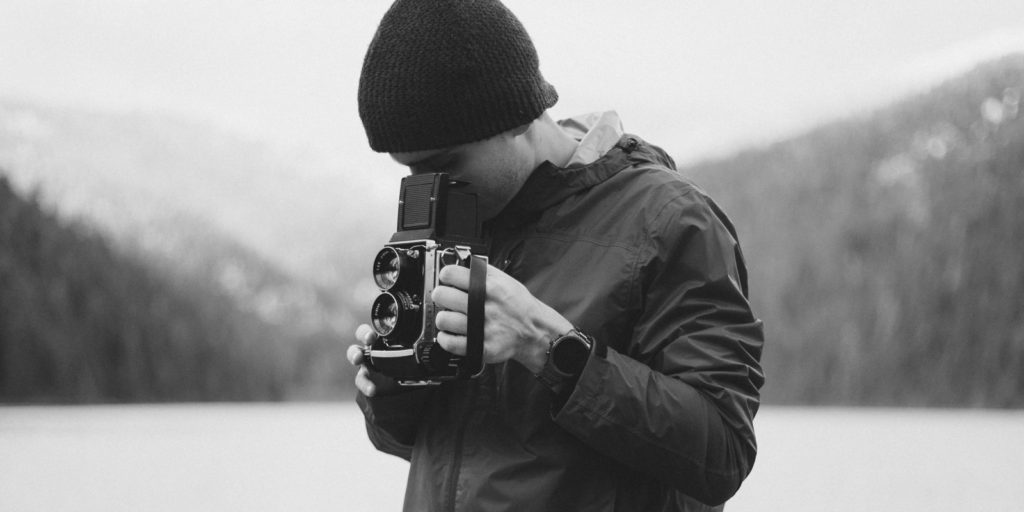
Mamiya C220 Viewfinder
The Mamiya C220 is a twin lens reflex (TLR) camera. This means that it has two lenses.
- The top lens focuses to a mirror that reflects to the ground glass in the waist level viewfinder.
- The bottom lens focuses light directly to the film in the camera.
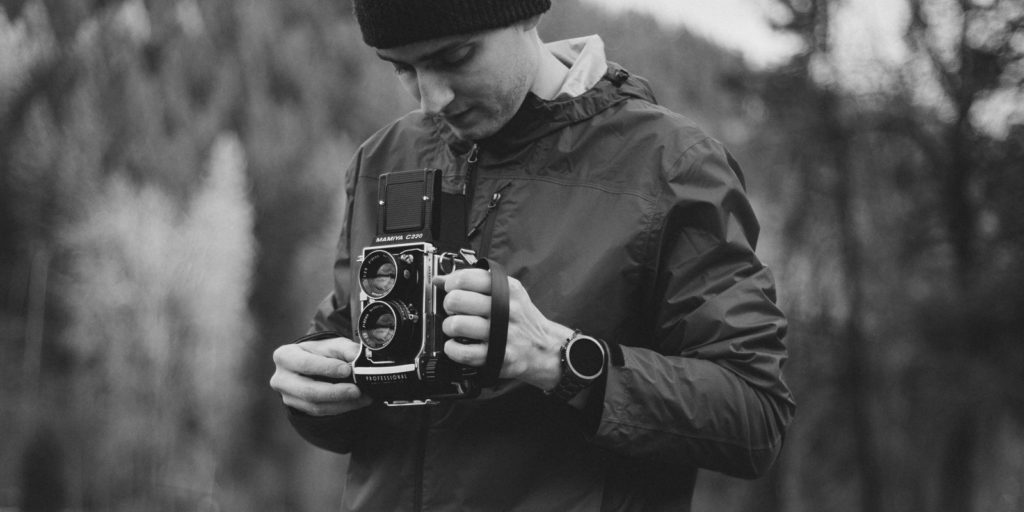
Using this camera is fun, and much slower than anything I’m used to.
The waist level viewfinder is new to me, and it’s a simple joy to see the scene reflected in that small square piece of glass.
How to take photos with the Mamiya C220?
- Cock the shutter (which is on the lens)
- Advance the film
- Meter the scene (there is not a built-in meter)
- Adjust the aperture and shutter speed
- Focus as desired
The camera is fully manual so you will need to use an external light meter of some kind, or follow the “sunny 16” rule.
I don’t have a light meter outside an app on my phone, or the one built in to my DSLR, so I use one of those two.
Obviously the final step is to compose and take your shot. I was surprised how quiet the leaf shutter is on this camera, especially at shutter speeds of 1/125 and above.
Slow Down and Compose Carefully
Using this camera, and shooting this format really encourages me to slow down and make careful considerations before each shot.
I find myself saying, “is this a shot I would take with my Mamiya?”
The Mamiya C220 demands that you take your time — time to manually cock the shutter, advance the film, meter, and make all the needed adjustments.
There is nothing automatic about the process.
Without a disposable income, I want to make sure each shot I take is worthy of licensing to a client or preserving a memory.
I’m hoping that shooting medium format film will help to improve my process and technique when shooting with my DSLR.
Why Shoot Medium Format?
Why medium format? I’ll be honest with you. I needed something to inspire me and to motivate me.
I needed something that excited me about photography again.
Even though that might sound kind of odd, I have noticed it before in my photography. When I get a new piece of gear, go to a new location, or learn to edit photos in a new way, I’m freshly inspired to go out and create.
I doubt I’ll ever shoot a majority of my images in this format, but if it pushes me to try new things, get outside, and make photos, I’ll consider it a worthy investment.
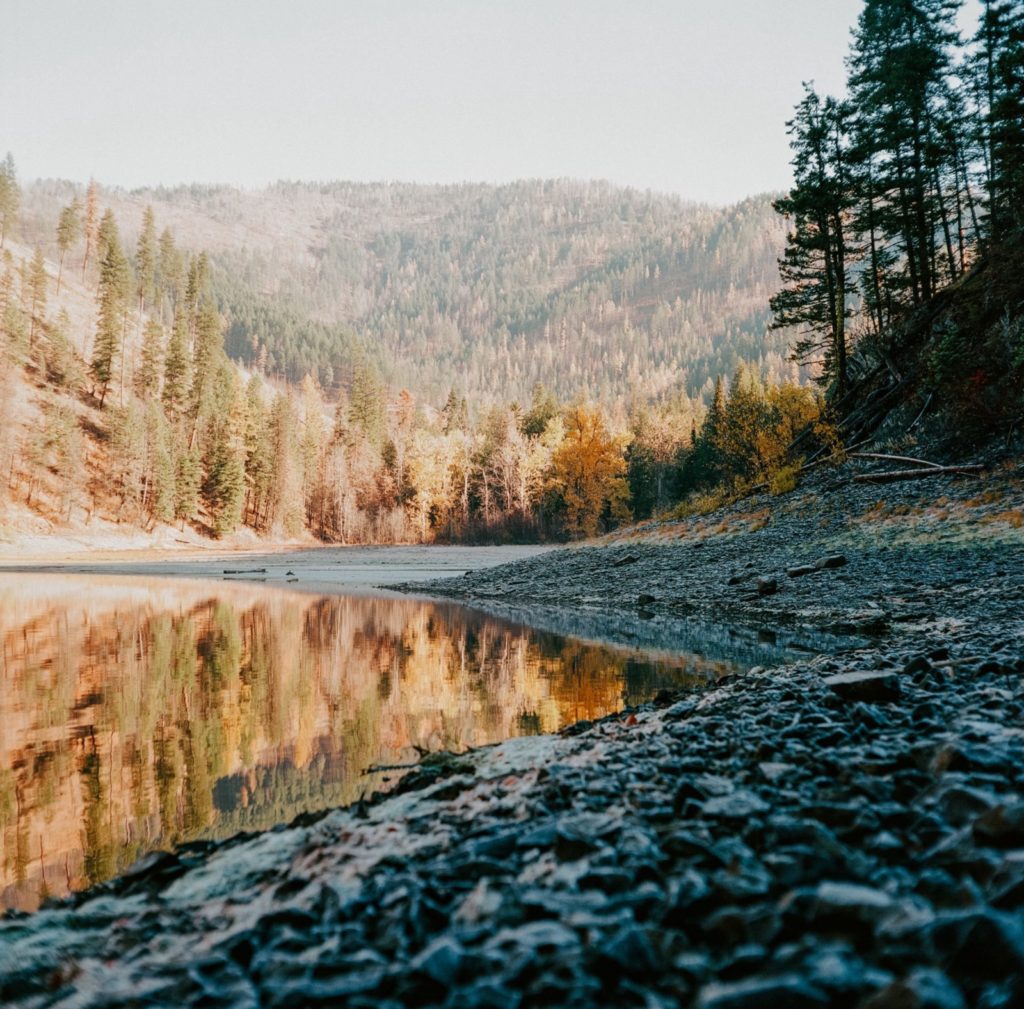
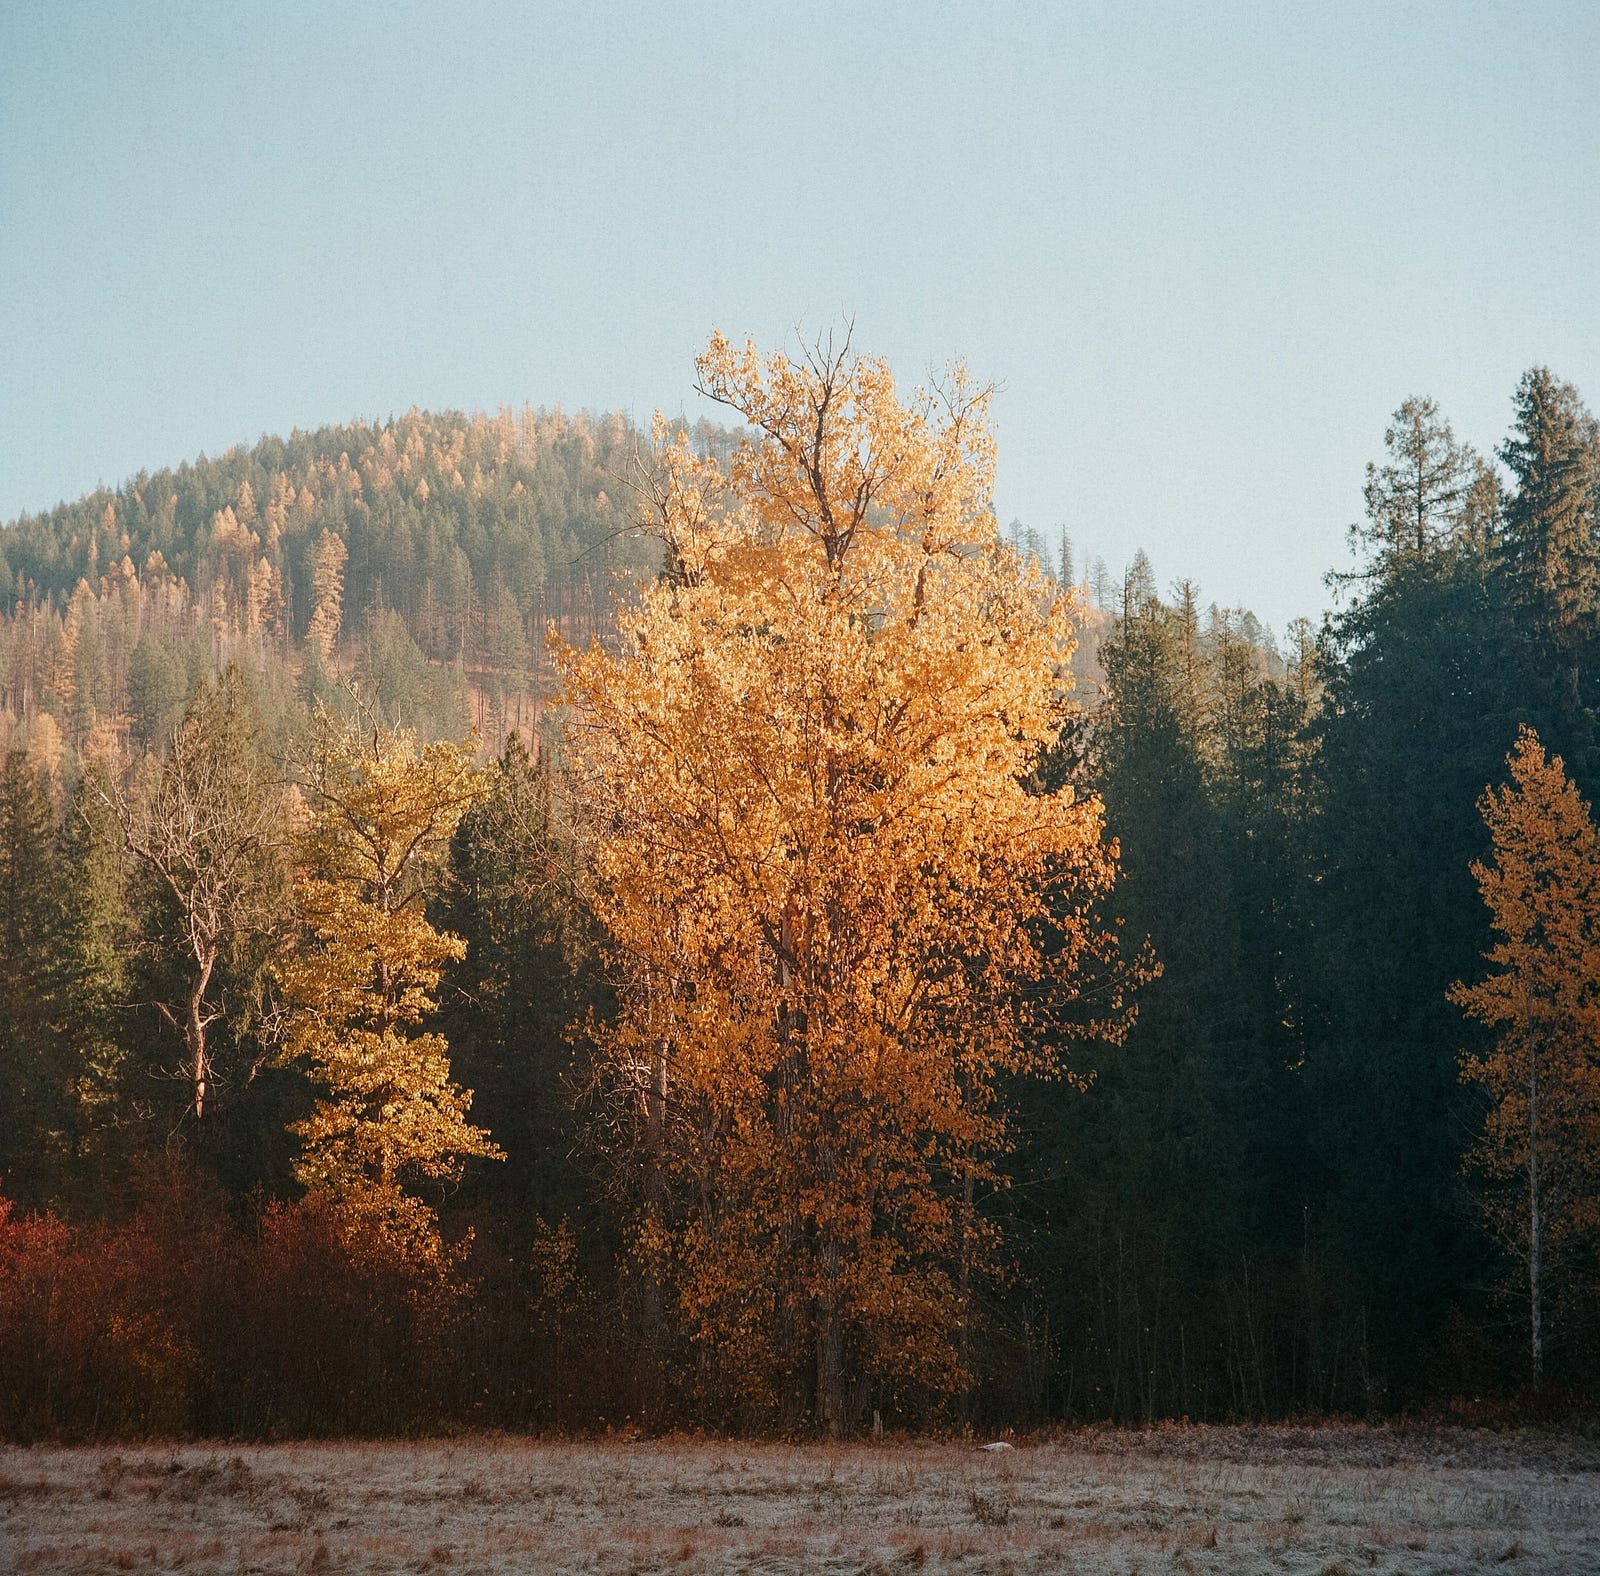
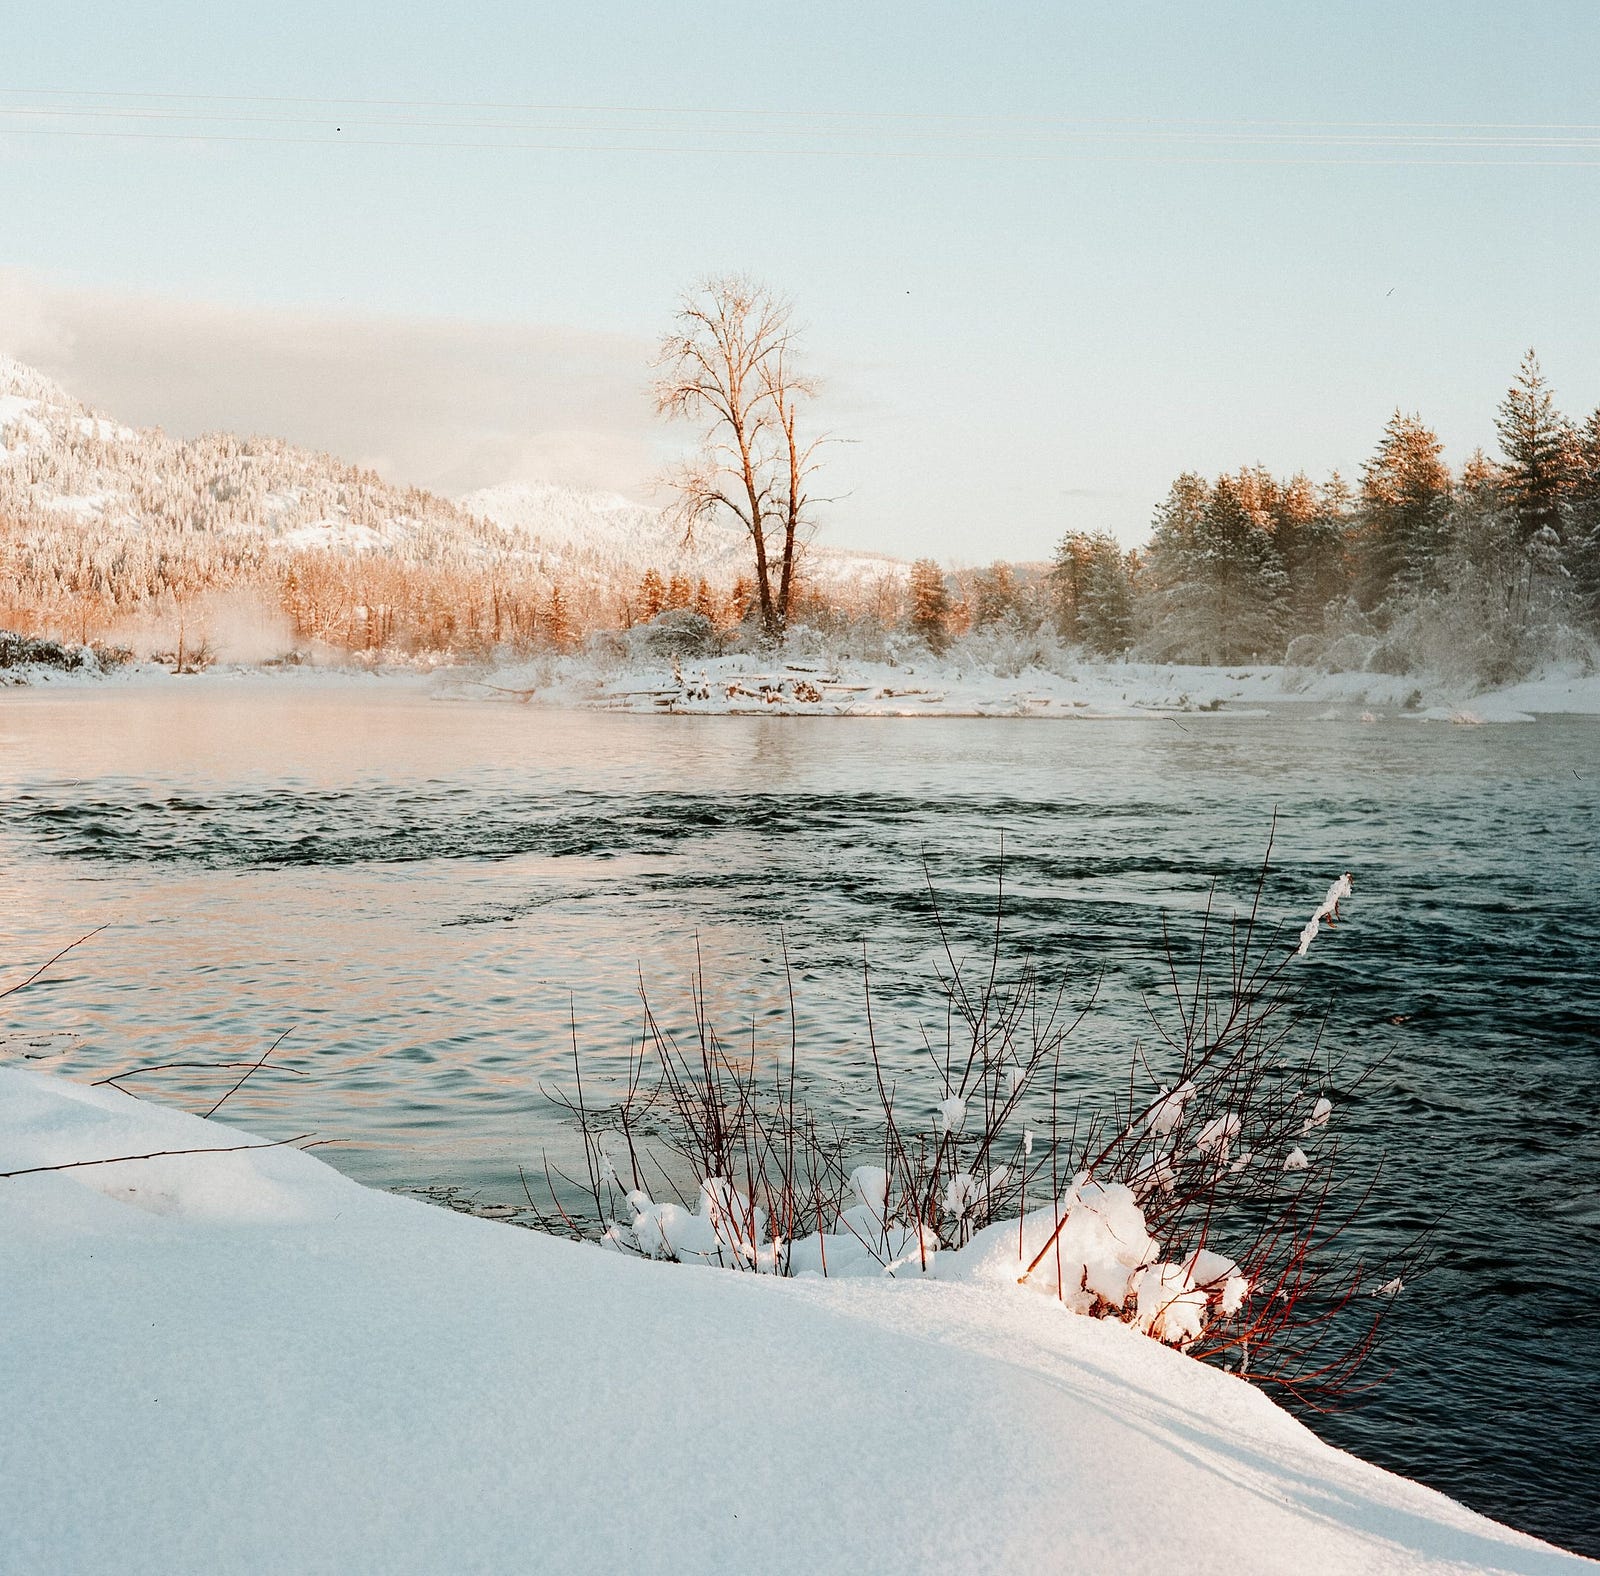
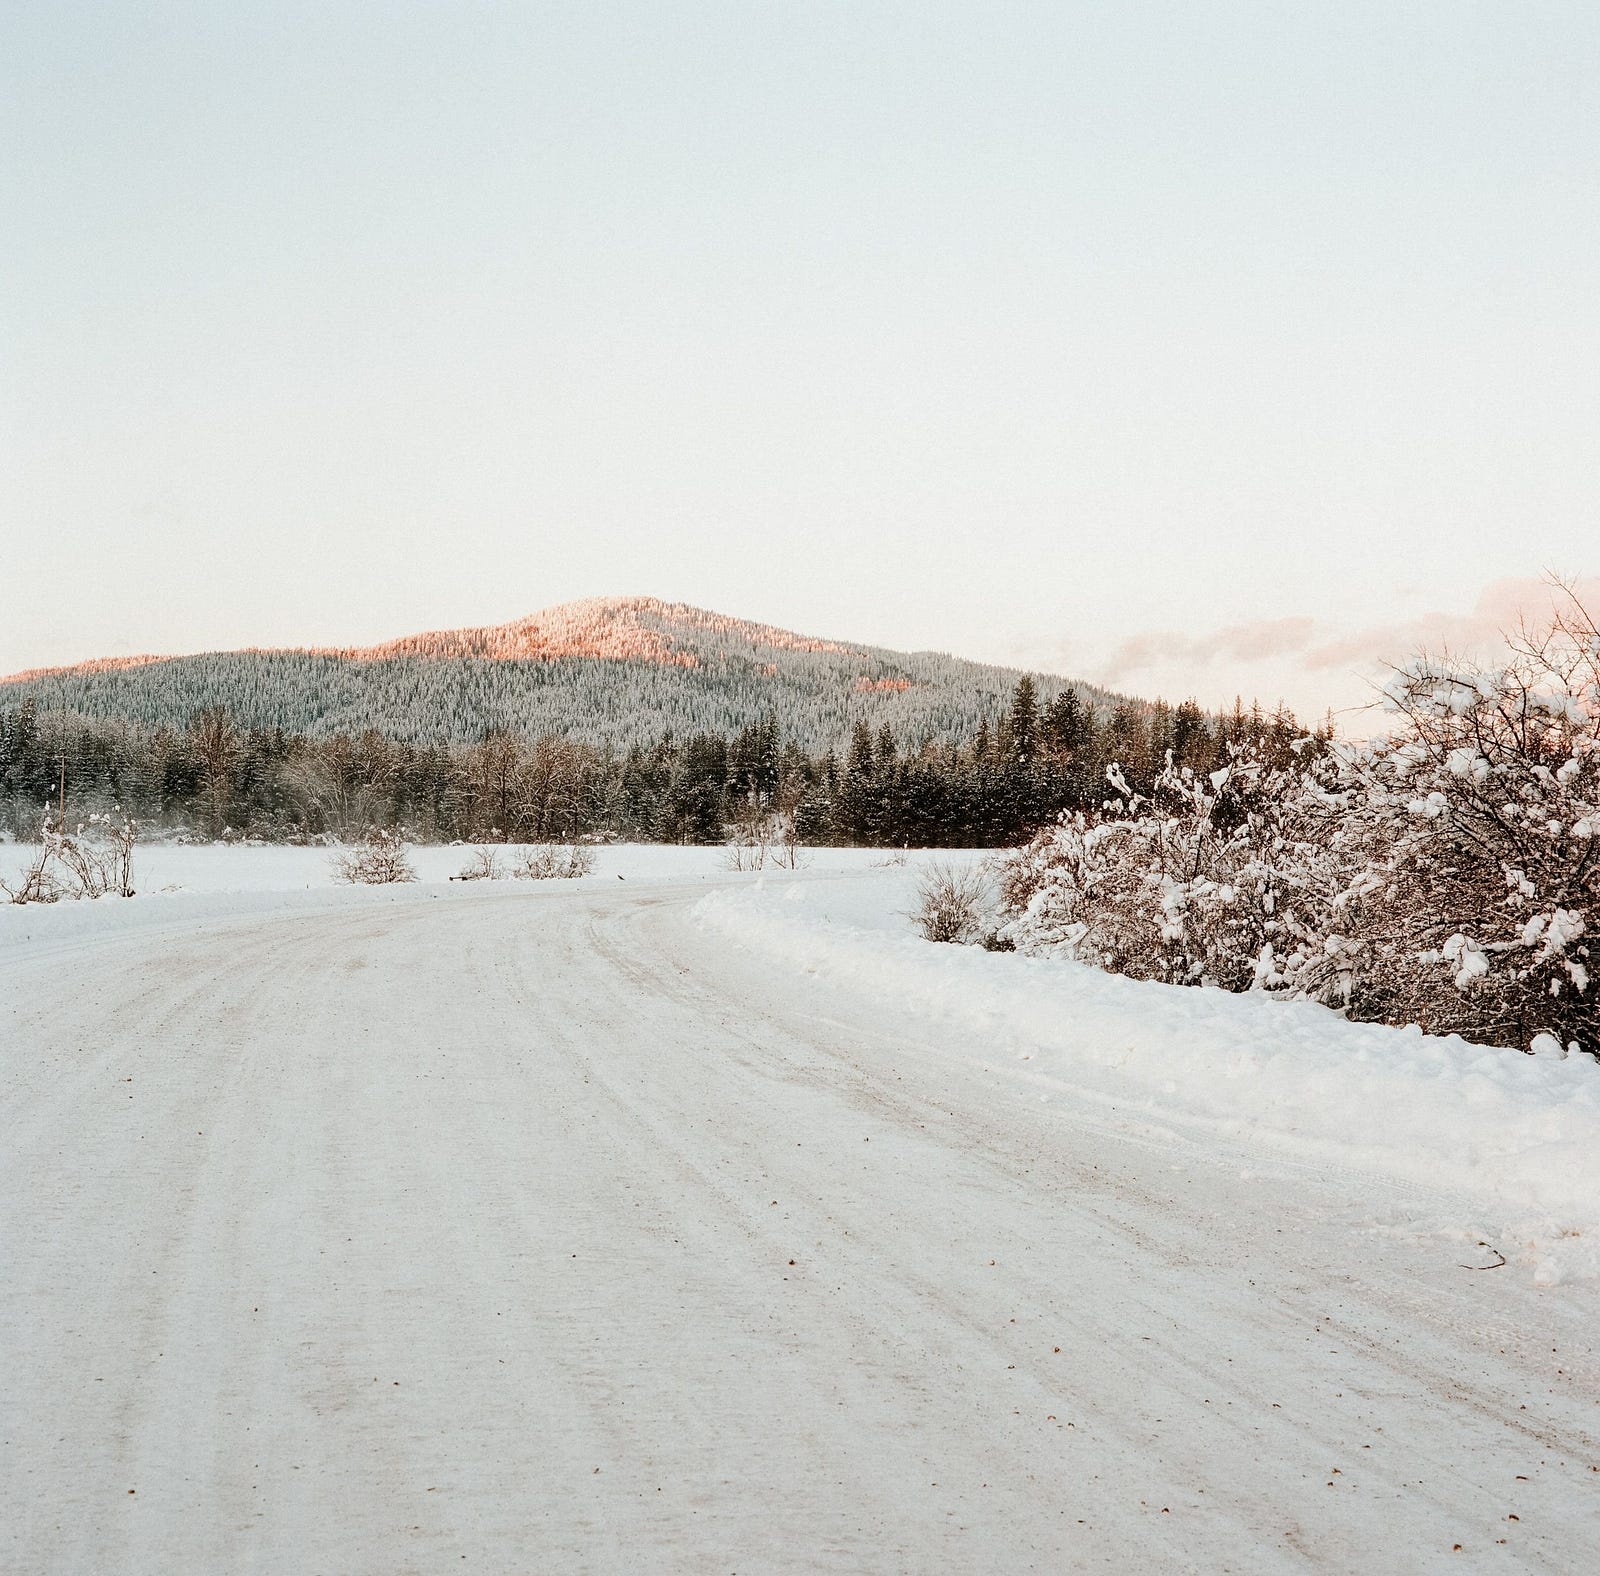
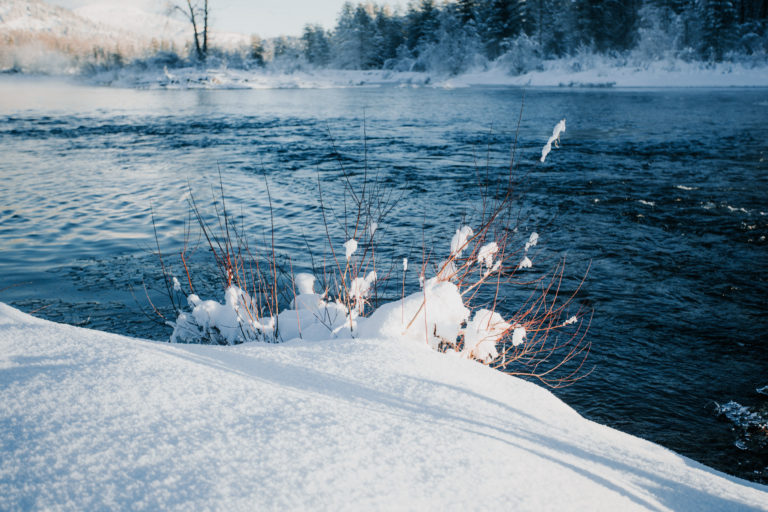
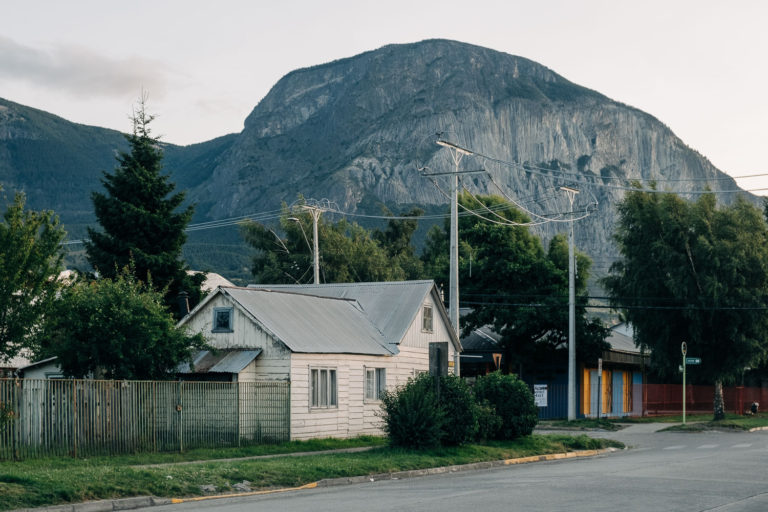
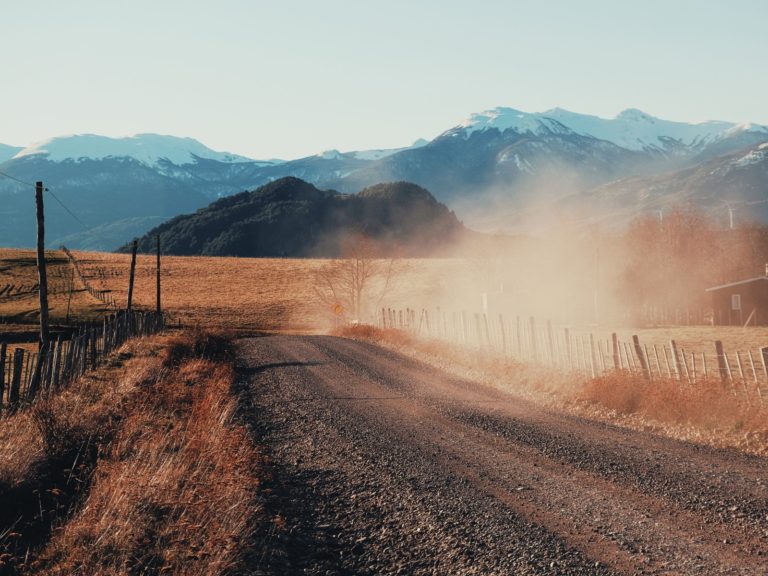
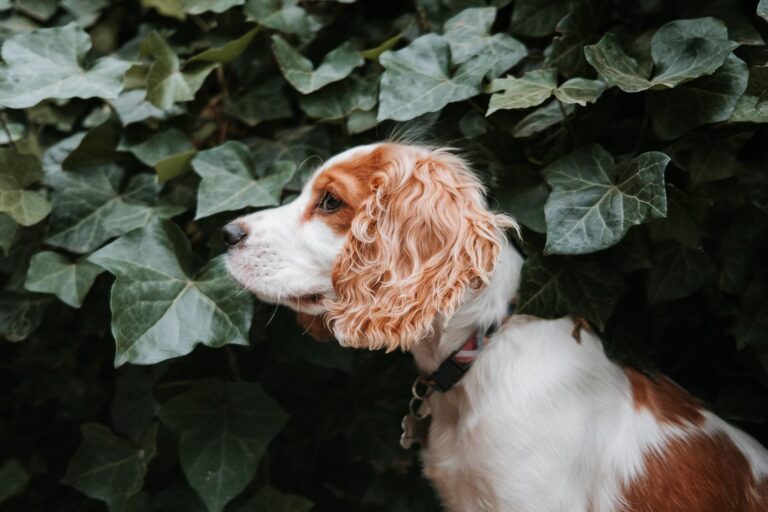
Mamiya C220 Sample Photos
Below are a few photos from my first roll of 120 in the Mamiya C220. They’re shot on Kodak Ektar 100 and gently edited in Lightroom with adjustments to exposure, contrast, and white balance.
Are you a film shooter, and have experience shooting medium format?
I’d love to know if you can relate to my experience of shooting 120 for the first time.
Drop a comment below.
I love chatting about film and photography in general.
I hope this post has inspired you to get outside and try something new!

Just purchased a C220. Will be arriving via post in a few days. Very excited to try medium format. I have only shot 35mm in the past. I appreciate the guide on how to load and shoot as I will have to figure this out for myself as well. Thanks
Excellent! I hope everything goes well. Drop a link to your work here once you’ve shot some photos with it. I’d love to take a look. I need to get another roll into mine and shoot it again.
Thanks for the article. Reading it I am reminded of my shift to MF during college around 1990. I had only used 35mm up to that point and the cost of moving up made every shot more ‘important’. My goal at the time was 16×20 prints. I couldn’t hardly afford the photographic paper so didn’t end up printing a lot but the whole process made me more carefully evaluate everything before the exposure.
Thanks for the reply! I was about 1 year old in 1990 so to me it’s great to hear the stories from people with more experience than myself.
I bought mine more than 40 years ago. Like yours, it came with a short telephoto that I hardly ever used. The 80mm is so good, I used it most of the time. I used it for weddings for years. It was so silent! The negatives were so large, the could be blown up the size of a wall. I still have it but have not used it in years. Thanks for the great article.
James Mason
Thanks for the comment! Film has gotten so expensive in the last year I haven’t actually shot with it recently.